Friday, August 29, 2008

Monrovia Art Walk 8/30 6:30-9:30PM

A little blatant self promotion. I'll be in front of the Paint N Play Art Studio and Gallery at 415 S Myrtle Ave, Monrovia CA. Can't miss me, usually and the louder more jovial one. It will be photographers night so Stephen Coleman, Joseph Davis and Doug Gordon will all be present in front of PnP. Stop in and visit if you have nothing better to do. Better yet, buy something!


Now for the Art. These are my 4 favs from the rejuvenation visit to the Getty Villa in Malibu (Pacific Palisades area of LA) on Thursday. The Getty Villa is where they keep their antiquities. They have a lot of things you can shoot as well as rotating special exihibits that you can only view and then get raped at the book store buying the book of the images.


These images were all shot HDR. Since the antiquities are already otherwordly I opted to keep these on the edge of real. Two are of the regular exhibition rooms, one the old arched entry before the remodel, and the other in the cafeteria. The latter is titled "Add children and use loudly.

Thursday, August 28, 2008

Cars, People and 'nother slip in the adventure bucket


I'm a pretty optimistic person most of the time. Rather than a bucket list of things I want to accomplish, I have a list of cool stuff I've managed to do. My adventure bucket keeps growing and its nice to see. Each adventure I learn something new, experience something new.

Tuesday I got invited to Ford's 2009 Media Ride and Drive for the LA area. Odd..they call it LA but actually I had to venture behind the OC to attend. All very interesting, more so in the talks about the cars coming our way and their new Sync system. Of course it allows me to get into more situations to photo stuff I normally don't get to do. I got this invite through a post I did regarding the 2010 Chevy Camaro on LA Metblogs. Of course this adventure appears as a post on LA Metblogs titled "Ford Takes LA Beaches and aims for a little more".

The images here are of the 2009 Ford Focus Coupe that is just now going on sale and of the 2009 Lincoln MKS that went on sale in July. The images themselves were taken during the pre-drive discussions with the PR Guys.

I shot them bracketed knowing that the people moving would be out of register and that would add to the surreal illustrative image I wanted in the end.

After the HDR file is generated I used photomatix tone mapping to adjust the contrast range, micro-contrast and the final blending to better isolate some items while allowing others to blend into the background more. That final file was then given the final post process in Virtual Photographer to bring back some contrast and saturation to further move it from the real to surreal in the final image.

I like the final images. The cars were the subject of the day and how the media attending interacted with them was more entertaining.

Monday, August 25, 2008

arghh....you don't redo a monet nor classic movies


Stop the Remake of The Rocky Horror Picture Show

And you don't redo a classic like Rocky Horry Picture Show.
Never.
Ever.

Honest...I must have seen it 50 times in college. WE can't deprive future generations of college students of the originals insanity. All together now...

"Its just a jump to the left
and a step to the right
with your hands on your hips
you bring your knees in tight
but its the pelving thrust that really drives me insane,
Let's Do the Time Warp Again!"

Sigh...why can't we let a few things just mellow with age?

Wednesday, August 20, 2008

I'm digging my little adventures...

I have to admit I'm having a pretty interesting set of adventures once I decided to quit being a cube dweller and follow the path of greatest curiosity. This weeks adventure was a ride along with the Pasadena PD. It was very interesting, definitely a lot more action than I had expected. The full story is on LA Metblogs.

While shooting photos I had a hard time deciding where i wanted to go with the images. I certainly didn't want straight documenting, that is what the newspaper is for and the real crime scene guys.

I'm at the point now all of my images are shot raw with the intention of fine tuning exposure or generating HDR files in the post processing. With this image once I got the highlights and shadows in control I still wanted that dark almost film noire sorta colorized Raymond Chandler old timey detective feeling. Coop has been working on a series of images that are half toned and I decided to take that direction on the final image as well.

The end result: "Late Evening Arrest".

Wednesday, August 13, 2008

Morning Coffee


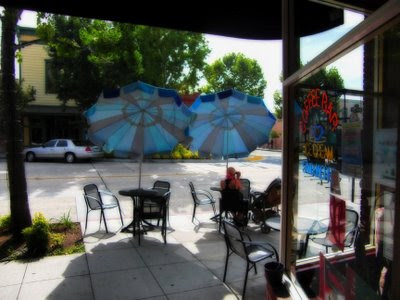
This morning I headed out for some coffee and a meeting with a person interested in running for local city council. That gave me a nice time to be down in Old Town Monrovia and just enjoy the quaintness of it all before the day heated up to a full broil. I spotted this mom type with her stroller enjoying the morning sun and a hot cup of coffee.

I composed the shot and went about my business. By itself it was OK, the post processing is the key to bring about an Orton image. I like the ability to control more elements like contrast, saturation and fuzziness in the digital realm.

A little technical stuff. The camera I shot this with was a point-n-squirt Casio Exilim that I have discussed here. The drawback to the camera is that it does not have a raw mode so I have to start with a jpeg that unfortunately does have some compression. At least with 10.1 mega pixels there is still ample to work with.

Start with your basic image file. Open it with CS2, then duplicate the image. Close the original file that way you don't alter it while working all your magic. Let the duplicate be the guinea pig.

With the new file go to image-adjustments and chose the brightness/ contrast option. As I prefer to have some detail in the shadows I up the brightness by 10-15 points, then I drop the contrast down about 5-10 points to bring back some of the highlight details.

I go to layers and chose "duplicate layer". From there I go into image-adjustments and chose brightness/contrast option again. I move the brightness to 25-35 points to mimic a one f-stop overexposure. The contrast is increased this time 10-20 points. I go back to adjustments, variations and use the saturation control. Setting at mid-point and add saturation in steps until the dept of color is just under the point I want in the final image. (Recall that the original image was lightened and flattened that did reduce your saturation a bit).

The layer then is given blur. Go to filters-blur-Gaussian blur. Pic a blur range of 15-25.

The next step is to blend the duplicate and the new layer (which is the background). Go to your layers box and use the blending tool. For this file I used the "multiply" option. I kept the opacity and fill at 100%. Note you do have several blending options as well as the ability to fine tune it by adjusting the opacity and fill levels.

The final image file then has the layers merged and run through Virtual Photographer to clean up the atmospheric haze as well as bring in some clarity to the tonal range. I opt to go for color and saturation settings that mimic the false color of fujichromes. (False as in they tended to do much better saturation with brilliant greens and blues without muddying the red tones, not entirely natural representation but certainly one that was pleasing to view).

Saturday, August 09, 2008

When HDR and Orton Collide


Orton alone tends to completly blow out highlight and black out the shadow. Doing an HDR first allows you to control the extremes first then when you run through an orton process you still have a good tonal range while still having the orton surrealness preserved.

This was shot bracketed +/- 2 stops then those raw files were processed into an HDR file with photomatix. Then the same program was used for tone mapping. The final image was given some color balancing then run through virtual photographer to give it the false saturation of a fujichrome transparency silver based film.

Thursday, August 07, 2008

Dioramas and the surreal capbilities of HDR


Museums love their diorama's recreating some era in history more than elementary school teachers do at California history lessons when they require a Mission be built.

They are always too neat and clean versions of how things were. Key period elements are usually neatly in place. Sometimes they go as far as to include paintings or photo's in the "windows" to give that added bit of "realism". It is very surreal, certainly more imaginary like the world of Wally and the Beaver than it ever was back in the day.

This week I ventured out to the Autry National Center and Western Heritage Museum in LA's Griffith Park. After checking out the newer rotating exhibits I took a meander through the permanent exhibits. To my surprise it was more than just the wild wild west, it included discussions and diorama's documenting how the western states developed right up to the post war era. Key feature was the Mrs See's home where her kitchen and den were recreated. Very clean and sterile, more romantic memory than it probably looked in real life, but interesting none the less.

It begged for a surreal rupture in the time warp. HDR helped me get there.

Once an HDR file is generated with photomatix you can use the tone mapping portion to take that file and adjust how your highlights/shadows are blended to preserve detail. Do you want more or less micro contrast? More or less luminosity to the entire image? How about blending between the two, coarse or fine? In the end you have a lot of control over the final images real or surreal qualities. Of course I gave the final image a post processing cleaning with Virtual Photographer to enhance those qualities.

Enjoy "Davy Crockett Bedroom" and "Mrs See's Kitchen".

Wednesday, August 06, 2008

Sometimes leaving it alone is best

I have to admit sometimes the tool used and the final image is just enough. I love this little image.

I used my trusty che-ez snap camera. Think of it as the Diana toy camera for the digital age. A plastic lens with pour optical qualities, very low .3mega pixels (yes POINT 3, or 1/3 megapixel) yielding very low res, uncontrolled contrast and saturation. It gives you these great little pics that are impressionistic by their nature. Not a damn thing needs to be done to them to enjoy them. You know how I loved the impressionists.
A fair warning about the che-ez if you want one. The bundled CD may not always be compatible with what is actually on the camera. You at times have to dig around the web for drivers that do work. They have a life of maybe a year or so, about 1000 pictures before the rechargeable battery craps out. I think I am on my 5th one since I found it in 2002 or so.
The camera I believe is out of production at this point. It can be found by googling it for usually under $20.
Full story behind the pic on LA Metblogs.

Saturday, August 02, 2008

rose hips...let them ripen

Rose hips from the rose "rosa hansa", a rose with a lot of wild rose parentage. It repeat blooms. It smells of cloves and spices. It rewards you with big red ripe hips if you let them go. What to do with hips?
make jelly out of them
make jams out of them
make a tea out of them
let them stay and become food for the winter song birds.

Friday, August 01, 2008

fauxtography...the art of the unreal

I didn't coin the phrase, one of my favorite writers did. His name is Will Campbell and you can find him on metblogs as well as on his own blog [sic]. He actually is owner and creator of the "fauxtography" flickr group. Anyone can join. Its a home for those photos that are faked and we aren't ashamed to admit it.

I was working the image and not happy with the sky as it completely blew out and lost all detail. Grrr....so I used the cloud tool, gradient tool and added a sky that is completely fake. I did it on purpose. It was fooling around looking to just work on that skill set. It is what it is and in the group pool.

Anyway, it has a name, it has a home. Fauxtography.

exaggerated perspective


One of my favorite lens to shoot with is an wide angle zoom, a 20-35mm to be precise. It allows for exaggerated perspective. Adjusting the angle by kneeling or standing on something also brings about other changes in how angles meet or converge. It all goes to altering the perspective and sense of space a viewer gets from the image. Even better in my book is that it also alters one sense of time and can add a lot to an impression of the subject rather than a literal interpretation. All good stuff in my book.

I continue to meander down a couple of different paths. Yesterday a couple of abandoned rail cars caught my eye while doing errands in Arcadia. I knew mid-day wasn't the time to shoot them. Wrong color of light and wrong contrasts. Dusk would be the best time as the warm glow from a setting sun will add a lot of character and nostalgia to a scene. Off I went once dinner was done to wander around the old rail cars and just shoot them. The also fit into the whole "arrested decay" direction that I have been exploring for many years as well.

I shot them bracketed for HDR file generation. The HDR files were done with Photomatix (no matter how I try with CS2's built in HDR I just don't get the control I want with it compared to what the plug-in can do). The images were then tone-mapped and run through virtual photographer for the final processing.

There you go arrested decay recorded and manipulated with the help of HDR.

Thursday, July 31, 2008

wasting time...

Doing my daily blog jumps around to see what my various friends are up to I stumbled across this nerd test over at faboo mama's blog. Its a nerd test, I scored higher than I thought I would as I've always thought of myself as more geeky than nerdy.

I am nerdier than 75% of all people. Are you a nerd? Click here to find out!

And what it all means.....

24% scored higher (more nerdy),
1% scored the same, and
75% scored lower (less nerdy).
What does this mean? Your nerdiness is:Mid-Level Nerd.
Wow, it takes a lot of hard nerdy practice to reach this level.
NerdTests.com has items exclusively for the True Nerd, click here to view.

Tuesdays meander along the river


For those of you who follow my flickr account know that I do a lot of silly blogging as well as put up chunks of unaltered jpgs from my shoots.

I shot it all RAW and those files are used to produce the final images that will be in shows and available for sale through some local galleries and online sources. I will often put in some dumbed down (ie low res small versions) on flickr as well so you can get a feel for the finished pieces.

Yesterday I did manage to get myself back to the San Gabriel River, this time I entered from Duarte's Encanto Park and walked across the old Pacific Electric Bridge. What is interesting to watch is how natural elements try to reclaim things put in place by us humans. Even the tiniest crack becomes the foothold for some plant to set up its own housekeeping. Other plants use what man put in place as its own impromptu trellis. Of course we have a habit of calling them weeds when they don't have some immediate use for them.

Two images here. One is a trail along a swampier section of the river near one of the big dams that serve to slow the flow of the water through the area. The Army Corp of Engineers did this to control flooding, but also to encourage natural recharging of the local water table through seepage and percolation through the porous soils of the area. That's a good thing.

The other image follows the Man vs Nature theme that I randomly revert to. In this image a wild sunflower (I don't know its real name) has grown around and through a chain link fence and using it as a trellis to support its growth. I like the contrasts that are present on many levels. The color of nature vs gray of man, the soft flowing lines of nature vs the hard lines of man, and nature using man made objects for their own purpose.

For the "River Trail" pic I did it in the Orton style. It is a simple process with CS2. Open the raw file then duplicate as a copy closing the original. Do what adjustments are needed to bring the color in balance then use the duplicate layer function. Increase the brightness and contrast of the new layer, then use gaussian blur to a power of 15. Then those two layers were blended using the "multiply" function. It was merged together then given a final post process with Virtual Photographer for that old timey Kodachrome saturation and printed on Cibachrome one would have (could have?) done in the old silver based Orton process.

Did I tell you how much I love working in the digital realm? I can only imagine the amount of darkroom time needed to get this result. And don't forget the cost factor either which makes digital art so much cheaper than the old silver based materials.

"Sunflowers" was processed from RAW. The resulting file was manipulated in its 16bit form to bring the exposure and color balance into check. Then it was given a run through Virtual Photographer to bring about the saturation and tonal range that the earlier Kodachromes were capable of.

Enjoy, its time to run off and do some more shooting somewhere.

Wednesday, July 30, 2008

Join me in the LA Bloggers community


View my page on LA Bloggers!

HDR and Orton...putting the two together

From Tuesdays shoot along the San Gabriel River. These windswept trees backlit in the early morning sun had quite a bit of drama and movement.

I shot it bracketed then merged the 3 RAW files in to an HDR file with the help of Photomatix's CS2 plug in. The same program was used for the tone mapping, coarser contrast control to allow the sky have sharper gradations to emphasize the portion where the sun was. When those were done then I duplicated the entire image as a layer, brightened it, increased the contrast and upped the saturation. The final two layers were blended using full multiply. Once that was done I merged the visible and ran the final image through virtual photographer.

End result is the trees are really the focal with their bright green spots and a nearly white back light. Enjoy...now to get a cake out of the oven and go do some more shooting.

Tuesday, July 29, 2008

Cactus Flower and Bee

Today thanks to a total alignment of stars and activity calender I was able to get out and do some shooting. Lucky me, I noticed yesterday that the powers that be turned on the San Gabriel River again and it was flowing fast and hard. Add in the rain we had two weeks ago and wild flowers were tricked into blooming again.

This is the flower of the beaver-tail cactus that is all over the southwest. It has this beautiful yellow bloom that turns into a huge red seed pod by fall. The local Indians actually eat that seed pod as well as the dethorned pads from the cactus itself. I'm not into the whole labor intensive prep so I'll leave that delicacy to the Indians and just enjoy the bloom.

This flower was done in the Orton style and post processed to bring on the deep rich colors of Kodachrome on Cibachrome paper.

I have quite a bit I shot along the river. Some is already done in HDR as I like the tonal range it brings to the table for the final image. Some were done in HDR and brought to the surreal...the graffiti under the bridge that I will need to work on some more tomorrow in the afternoon.

Goal...Weds morning, gawd willing and the ground isn't shaking again is to have a stroll through the other side of the San Gabriel River along Duarte's Encanto Park.

A picture a day keeps the insanity at bay.

Monday, July 28, 2008

An image a day...and catch ups


I must be insane, but that is the goal. One image a day until MAFA's Celebrate the Art's October 11 & 12. Between that show and Kathie Reece's request I bring more into the new Aztec Gallery and fill a wall I have my work cut out.

Shoot more, at least 3X just set aside a morning or evening to do just that. I hear they turned the San Gabriel River on again so maybe I'll meander down there.

Vanity, insanity there is a fine line but I really want to pull together some strong new images along the Orton theme I have been exploring the last few months. Since I am the featured artist for this years show I really want to have the biggest impact at the show yet.

The first two are new images shot the other day. Interesting things that caught my eye either through repetition of shapes or sweeping curves and brilliant contrasts. The last is an old favorite from a trip to the Easter Sierra's a few years ago. I think I'd like to do that one again soon.

Wednesday, July 23, 2008

Camaro RS done in HDR is a good match up


It happened, I made it to the Chevy Camaro Reveal media event and dinner. It is really a lot of fun talking with the designers, artists and engineers that created this car. Pretty amazing stuff, certainly a good bit to add to my "bucket" of things done.

Full story about the car on LA Metblogs : Next Generation Camaro RS hits LA.

I do have to admit that HDR is still a kick in the pants to work with. The control over your color and tonal ranges never ceases to amaze and make me want to explore the potential further. Shot bracketed RAW, HDR file generation and tone mapping via Photomatix. Final image processed with Virtual Photographer.


Monday, July 21, 2008

Just a little downie fluff


It is the little details that catch my eye. I see things a bit differently. Somewhere out there we have a little chick losing its downie feathers and soon will be flying about.
Shot with a new point and squirt while testing its abilities and limitations. Post processed in the Orton style then given a final post process with Virtual Photographer to have the Cibachrome look.
Stay tuned...the fraz got invited by GM to attend tonights meet the press with the 2010 Chevy Camaro Team in Santa Monica. This could prove to be interesting.

Sunday, July 20, 2008

Arroyo Hotel...ala orton


Caught it just as the sun was setting from the Suicide Bridge. Busy crowds with the Bridge Party that night, I may have to back soon and reshoot with the "good camera". The majesty of the old hotel over the gorge was something to see and with the sun hitting into the windows it took on its own other wordly glow.

Reworked in the Orton Style andpost processed in Virtual Photographer.

Friday, July 18, 2008

Call me the judge...at least in a local photo contest


The guys over at The Foothill City Blog are running a photo contest. Real prizes, discounts for entering and other details can be found at their "Take a Shot at City Hall" post that ran earlier this week. Obviously the preference would be a Foothill City, LA Metro or So Cal city hall since that is where we are located. It doesn't mean that you can't send your best shot of the city hall from Crumbling Dust Wyoming if you think its a powerful enough image.


Briefly, if it is a picture of city hall or a portion there of it is eligible for entry into the contest. Upload your entry to flickr and add it to The Foothill Cities group with the tag "cityhallcontest" and you are in. You need to have it done by 8/1 for judging in the contest. The top group will be selected from a readers vote.


The photo is done with my new "point and squirt" a Casio Exilim EX-Z100. Quite a nice 10.1 Megapixel pocket camera. Its limitations didn't take much to find. Little contrast control, drops both shadow and highlight detail quickly, not so good color gradation, overall pretty good saturation and sharpness. Definitely a handy toy to have when I just meander about rather than lug the big camera and stuff out all the time. Such a deal too...$199 at Costco this week with coupon, I remember my first digicam not even 8 years ago was 1.3 megapixel and cost $240 as a reconditioned. Big changes in price and huge leaps in overall quality as the technology improved.


This image is an Alexander Rose, an English Rose that is a favorite in my garden. I love the simple single rose and when it repeat blooms it becomes a star. (Many are singles are so close to the wild rogosa's they only bloom once in early summer so this is a special treat).


I shot it with the new Casio while testing its limitations and abilities. I post processed in the orton style with CS2 then ran the final image through Virtual Phtographer for the saturated warmth of Kodachrome and contrast of a Cibachrome.


Now get out there and shoot city hall and enter the contest so I have something to do!

Tuesday, July 08, 2008

Route 66 Art Gallery Grand Opening this weekend

The Aztec Hotel and MAFA have a new joint venture going. This is going to be a gallery that doesn't have white walls. It will be a gallery without a stuffy 'tude. It will be a gallery with a huge reference library on art for anyone one that wants to take some time to learn art history, art technique or just sit and ponder what an artist is capable of. Of course, it will all be available for purchase should you find the piece that strikes a cord deep within your soul.

The Route 66 Gallery can't be missed. It is right at the corner of Foothill Blvd and N. Magnolia in the historic Aztec Hotel here in Monrovia.
From the official press release:
All MAFA members are invited to attend the Grand Opening of our latest Art Gallery, Route 66 Gallery located at 301 West Foothill Blvd on Saturday July 12th from 5:00 to 9:00 pm. Our first exhibition will be “California in Bloom.” In addition to oils and watercolors, our display will also include photographs, sculptures and ceramics.

Light refreshments will be served, accompanied by live entertainment
I'll have several old favorites and new images at the show. Among them is "English Rose Bud" which was taken in my garden. It is the English Rose "Pat Austin". I shot it RAW, then worked it in the orton style while keeping some detail within the image. When done I ran it through Virtual Photographer giving it at bit more contrast and saturation like one would find on a Cibachrome print. (I still refuse to call it ilfochrome which is the name given after purchase by the ilford people). The final image is 8X12 matted and framed ready to go to a nice home!

Friday, July 04, 2008

it oughta be a law

gator shedding damage

Small rant on an otherwise great weekend going in LA Quinta. No big rigs should ever be allowed to use retread tires, especially when crossing the desert in 115+ heat. Ever.

Yesterday in the opposing traffic one such truck shed his skin and went flying across the freeway, at me. It went right over the concrete divider and whacked my front bumper. Nothing to but watch it come at me as the outbound traffic I was jammed. Damn.

The noise was loud, scared everyone in the back seat who were watching a movie rather than the road like I had too.

Sigh...as if I didn't have more important things to do with a hundred bucks than pay a comprehensive deductible.

If they don't ban them in CA they could at least require a serial number on the tread that would show even on the marks as it skids across your car!

Rant over. Time for brekkie. Then it is an afternoon in the pool doing a rotisserie impression.

Tuesday, July 01, 2008

One more Orton Rose and then off to sleep

One more print done in the Orton style. I'm debating whether I should include in the series or not at the Route 66 Gallery in the Aztec Hotel on 7/12. I like it a lot, the debate remains whether to include or not as it isn't as brilliant as some of the other floral Ortons I have done. It does have the deep saturated color that I like about this look.

To produce I lightened the original file by 10 points in the brightness adjustment tab. Then I did a duplicate original and worked on the duplicate after closing the original. I then duplicated the layer as a background copy. I lightened it another 10 points, then used a gaussian blur at 20 pixels. I used multiply to blend the layers. Setting the opacity at 75% to have a bit more sharpness. The image as then flattened.

The next step was to open up Virtual Photographer and increased the depth of the mid tones and brought the darks up, warmed it up 20%. In the final group of tabs I used "saturation" in the style drop down and used a 200ASA Grain filter. Voila...a kodachromey rosebud in the shadows at dawn.

I little bug on a rose and one for your ear

As I mend and move along I'm running back and forth between Orton and HDR work. Today I explored Orton just a bit more. I like the result, soft, saturated color and still preserves edges on close inspection.

The bug on the rose popped in every so briefly while I was shooting. Not often you get something like that to pose for you. I'm glad this one did as it added that element of surprise to the image. The rose it self is the Austin English Rose "Pat Austin".

Now the bug for your ear. Mark your calender for 7/12. The Route 66 Gallery, a joint effort with the Aztec Hotel and Monrovia Association of Fine Arts is opening that day. There will be an open house and hosted reception from 5PM to 9PM.

Of course I'll have several pieces there. I haven't decided what I will bring. I know the curators are looking for more realistic art, though impressionism is permitted...whew as you know where I like to play!

Enjoy "Bug on a Rose" and I'll keep you posted as to what I will decide to do next.

Saturday, June 28, 2008

Baseball inspired HDR work


My neighbor Craig is a pro-baseball scout and batting coach. He has a client who has season tickets to the Dodger's game. Those seats are 16 rows up from the 1st base dugouts. Last night he passed the tickets on to Craig and I got an invite to attend. Primo seats at one of my favorite games. "The Freeway Series" with the LA Dodgers and LA Angels.

It was a pretty good game. Dodgers were on top of it all pretty good, actually very much on top their game as the final score was 6-0...yes the Angels didn't score a single run. I can't remember the last time the Angels were so completely shut down like that. I almost feel sorry for the Angels' fans that drove up from the OC to watch the game.

As always I bring the camera along and shoot. One of my fascinations still is HDR and how movement is recorded during the conversion from 3 RAW files shot in sequence to an HDR file. Tone mapping allows you to go real or surreal. I went both with these, though one is definitely more on the surreal side. Final images are post processed with Virtual Photographer. Regardless of the options available I still go to the exaggerated saturation of the early Kodachromes.

Friday, June 13, 2008

making a mess art...well sorta

I don't know what it is about this yard but the story behind it puzzles me. I've actually been by it hundreds of times and never paid much attention to the ever growing piles. What is wrong with the residents? Ill health? Packrats? What does the inside look like I wonder as well? Is this a giant swap meet waiting to happen? Why hasn't anyone stolen anything out of the yard. If someone did steal from the pile would anyone notice? Why hasn't code enforcement noticed it yet?

It certainly is unusual for the neighborhood. It was not what one would expect. It just begged to be made important and surreal. I think I did that more so with the opening image. The fence keeping it all in is just a nice touch.

These were shot bracketed, the RAW files combined via Photomatix HDR file generation. The HDR file was tonemapped using Photomatix. Virtual Photographer was then used to adjust the final image.

Saturday, May 31, 2008

A little Orton exploration

Am getting a little bored just lying around. Although I'm getting better just don't have the energy or the mobility to go shooting. I did feel well enough to fire up photoshop and dig through some older images I liked and see what I could do with Orton.

One of my favorite flowers is the African Iris aka "Fort night Lily". Its a no nonsense, no effort, odd pruning out every couple of years and whatever water falls on it keeps it going. My kind of plant.

This image was shot early morning for the longer shadows. It was framed so that the bulk of the plant was in the shadows with only the blossom in the light itself.

I discovered a new Orton technique with photoshop that I decided to try in photoshop. Pretty simple and straight forward. I think I like the results a lot more than the other I found.

Open your file. Duplicate with a new layer and name it "sharp". Use the sharp filter and sharpen the layer. Use the adjust tab and adjust your saturation and color curves. I increased the saturation for this layer from "0" to "25" Change the blend type to "multiply". Merge down the layer.

Use the duplicate new layer and name it "blur". Go to the filter tab again and use the blur option, "gaussian blur". Adjust blur to desired level, for this image I opted for a blur level of "20". Next go to the adjust tab, chose brightness and adjust brightness upwards, for this one I used a "20". Change blend type to "multiply" and adjust the opacity which I used at 75%.

Merge down the final image and save as a jpeg with maximum sharpness (IE minimal compression).

The steps aren't hard, a little time consuming but when you can find a tutorial out there it is pretty easy. In the end I like this a lot more than the original image, then again I like the romantic impressionist view of the world.

Enjoy, now for a hot tub and an ice pack as I've had enough up time for one day.

Friday, May 09, 2008

Things are going to be coming through a little slow

Just when you are on a roll things can go sideways. Tuesday sitting traffic some crazy old guy rearended me. HARD. Then for good measure he backed up and gunned it again ramming me hard a second time. Basic neck and back sprain/strain. I won't die and its proving out my brothers theory "we're like cockroaches...you can't get rid of us easy". It will slow me down a bit so do don't expect a lot of rapid fire stuff like I had been doing. (The circle is around c5 subluxation that is causing the neck problems).

Pics in my flickr set "I has car wreck" named in honor of the Lol cats.

Sunday, May 04, 2008

Orton or HDR?


Tough to tell which I like more or less than the other. HDR has a way of capturing such a complete tonal range and a few tweaks makes it very surreal. Orton does similar.

The 3 complete cars are done in HDR. The trim detail on the '47 Road Master grill was done with Orton in mind and added in a layer of grain. I give them a final wash with Virtual Photographer to bring about a depth of color found in the old Kodachromes printed on Cibachrome.

Neither are entirely real interpretation and presentations. I tend to real back with HDR and be a bit more literal. I like them both for different reasons. I guess I'll be running parallel paths for a while.

Thursday, May 01, 2008

Still running down the orton path this week

This morning I took advantage of the cool air, brilliant warm sun and no fires in the area by taking a walk through Duarte and Monrovia. I shot most all bracketed as I do a lot of HDR processing.

I have to admit that I am totally digging the orton effect being recreated in the digital realm. I found a new method with CS2 on flickr and worked with it some. I think the results are much closer to the orton I remembered.

Creating these I opened a raw file for max data and adjusted the "normal exposure" then opened and saved as a no compression jpeg. I duplicated the layer the went to filter>other>high pass and used a fairly high ratio. Then I took that layer and adjusted the blur but going to filter>blur>gaussian blur and used a moderate ration of 15-30. Then I went to adjust>brightness and lightened it up approx 1 stop.

The blending I used was "multiply". Then I flattened the image. A final correction with adjustments>levels then tweaked the highlight and shadow ranges. This was then put through virtual photographer to bring colors closer to what one would have found on Kodachrome printed on the old Cibachrome pos-to-pos print material.

It sounds like a lot of steps but after a few times I got the flow and it goes pretty fast. It still takes longer to resize for here and flickr before saving and posting somewhere.

Monday, April 21, 2008

Quite the honor tossed my way!

I got the call the other day. The Monrovia Art Festival Assoc (soon to be officially renamed Monrovia Association of Fine Arts) has named me "Featured Artist" at this year's Celebrate the Arts to be held October 11 & 12 2008 here in Monrovia.

President Bill Beebe gave me the news, told me I earned it for all the work I put into the organization as well as the consistent quality of my images. His parting words..."Go forth and produce some great new things".

Well, I think the Orton series I just kick started today may be the trick. I'm totally digging the effects being recreated in the digital realm. Virtual Photographer helps recreate the soul of the old silver based media it was originally done in.

This image is my most favorite so far. I have a lot to go back and do. Duh...I have no idea why I never dug into it more. Enjoy, more to come. I have an "Orton" set running on Flickr so enjoy the set at it grows. Drop me a note on what you like or dislike and why. I like feedback. Honest.

Orton...the next path to meander down


Back in the college I remember a few of the guys in the fine art program were very heavy into the orton process. They got some pretty amazing results if you were into the impressionists painting and the like. I was pretty enthralled with the idea so I too experimented in it a bit.

The process was pretty easy. You had to use slide film to in order for it to work. You exposed your first slide for accurate exposure and sharp focus. The second exposure you threw it out of focus quite a bit then over exposed it two stops or more. The two slides were then combined and printed.

I opted to do my printing on cibachrome as it was a very contrasty and saturated media compared to the other positive to positive papers and processes at the timeThe results were show stoppers as it looked like a foggy dream instead of a literal translation.

To be honest I nearly completely forgot about it until one day I spotted an image that was done orton style on flickr. Turns out they had an entire group and that got me to thinking about it all over again. It took me a few months to get around to tinkering with it, but enjoy my first experiment.


This test image from Riley's farm is a bit more involved. I took the overexposed image of a series shot for hDr. I blurred it significantly with the guassian blur tool. I saved it as a copy. I then took the normal raw frame and genderated an hdr file with the overexposed blur too. The HDR then was tone mapped and next to micro contrast controls while tone mapping. The final image was run through virtual photographer with contrasty slide overlays upping the saturation of the colors and adding a "film grain" pattern. A lot of work and definitely an example of digital art rather than a straight up photo. I liked the result now I need to get the steps needed loweredI have a lot to learn but you get the direction the next meander is taking me.

Orton in the digital world exploring the surreal in another meander I'm starting.

Wednesday, April 16, 2008

Road trips and Spring are a good thing.

Spring and Road trips are good combos. The colors are their most intense. Capturing the intensity isn't always that easy. This years trip took me up from LA to San Luis Obispo, San Simeon and back all along the coast.

Knowing a little about contrasting colors is a big start. Growing up my generation got that in elementary school art classes. The contrasts vary with the time of day and whether you have clouds in the sky or not.

Learning about the color of light during the day we picked up along the line. I still remember a basic Color Photo class in college where we took a series of pictures from one spot one hour apart from dusk to dawn to watch the progression. Slide film worked best as you couldn't balance out the shifts during the day. The day starts with the red end of the spectrum getting the emphasis moving to Blues at mid-day then back to the red end at dusk.

This photo the brilliant orange flowers I spotted blooming at the Santa Barbara Zoo. Orange's direct contrast is Blue. A lesser contrast is Green. To make those flowers really pop I altered the framing to get more of the blue sky in. Add in the mid afternoon sun with only a light haze and you have two shades of orange contrasting with each other. Color Contrast, Sharp Shadow Contrast and you have an image that grabs the eye and shakes your sensors a bit. Not relaxing but vibrant.

Time for me to get busy and sort and process the 12 gigs worth of pics (all shot RAW so the files do take up a lot of space).