Thursday, May 20, 2010

HDR Photorealistic option


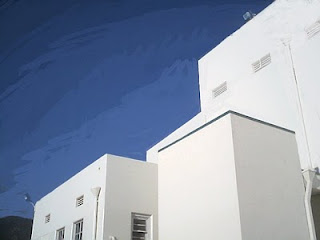
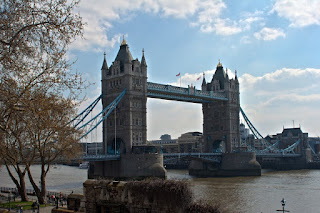
'Nuff said. It works. Old image that the drop down not only teamed the demons of ultra contrast range but multiple colored light sources. Life is good when you want to be a realist and still use HDR generation.

Wednesday, May 19, 2010

Autochrome and CS5


I can get the feel, but not the same delicate images. I can create grain, but that is part of the equation. The original autochromes had potato starch that was died and outlined with carbon black. I can duplicate the color grains by adding noise and pointillising the image, but I can't get the black outline around the "grains" created in CS5.

I shall keep working on it, but until then here are two images in the style at least to keep me contented that I am on the right track. Once I nail it I'll post the step by step it took me to get there.

Tuesday, May 18, 2010

A little orton...of an area now burned out.


Concurrent to the Station Fire that wiped out so much of the Angeles Forest in the San Gabriel Mountains there was the smaller Fellow's Camp fire that did damage as well to the forest. I'll be heading up there in a day or so to see what wild flowers and other green has returned to the area. When I was last up there, much of the west side of the river was burnt to the ground and nothing but ash, but that was January before the rains really came in hard and washed stuff away.

Hopefully there was enough rain to ensure the wild flowers and stuff returned this spring. It will be many years before this view looks the same. Maybe I shall get a pic from the same vantage point and post as a comparison in the coming days? Maybe.

Monday, May 17, 2010

Another stab at painting...


This is quite the learning curve I am on. Right now am just learning one brush at a time to see what it does. This time around its a wet stiff bristled shorty. So far so good, what my next step after completing the learning about what each brush does...is to learn to combine them on one canvas like a real painter would do.

I have learned its a must to scroll in close and work top to bottom doing back grounds before the foreground or subject matter. It does make it much easier to bring about the feel of a painting.

Out of focus backgrounds are a challenge to blend and I am not completely happy with the result on this.

Iris. I have a ton of them, enjoy just this one.

Sunday, May 16, 2010

More with the magic brush...wet pick up and bold brush


OK...I haven't decided whether this is a useful tool in my kit or just a novelty. Regardless I am enjoying using it and learning what it can do. I see the potential to apply it to "real photographs" for some spot work as well as making paintings. The latter I think on watercolor paper will help the "painterly" effects even more.

What you see here is the original image and my rudimentary learning on how to use the tool.

A little surrealistic HDR work


The surreal tab in the HDR menu blasts contrast and details, leaving an end result not unlike how one would imagine a nuke blast looks. I kind of like it.

I've been sitting on this one for a little while, mostly because there were some huge power lines running through the sky that I just couldn't get rid of in old CS2, or at least delete them believably. In CS5 and the "content aware" fill as you use the "band aid" to remove them its another story. An otherwise distracting element rendering an image you want can be saved in CS5. (I should note the proper name for the band aid is "spot healing brush" with 3 other tools available in a drop down available by right click).

Saturday, May 15, 2010

more fun with magic paintbrush


This is actually kind of fun. Tedious with a mouse, but fun none the less. The magic paint brush lets you pic up color from the underlying layer whilst painting away. Blending and all that other stuff is done with adjustable presets allowing some of the underlying to show through, if you want.

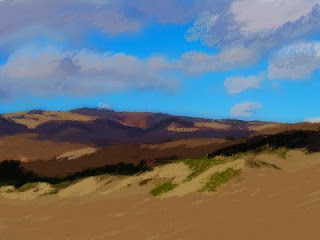
In playing around with this tool I've discovered that the lower res, smaller files are easiest to work on and get acceptable results. I tried working on an 8 megapixel image and nearly lost my mind sampling small areas at a time and trying to paint. It is much easier to reduce the size of the image and dpi and work from there. The compression of detail doesn't matter, actually helps in putting together an impressionistic image...like Painted Jalama Dunes you see here.

I really need to invest in a pen and tablet if I am to explore this option further. Of course to get there I need to sell A LOT of prints.

Friday, May 14, 2010

One more orton and I call it a day...


This area is gone now, the Station Fire of last fall saw to the destruction of much of the Angeles National Forest in the Big and Little Tujunga Canyons. Sad, but I have this little bit recorded for posterity and it will be years before it looks like this again.

Fortnight Lily ala orton


Thankfully tools in don't change much and I can easily create layers and ortonize images. This is the Fortnight Lily aka African Iris that has been given the Orton treatment. Starting from RAW files as discussed earlier gives one a lot more detail to work with to start, the added bonus comes into play when working in the orton style in that you have highly detailed layers under the blur to add to the impressionistic feel of the final image. I like that.

Meander through the garden this morning...


With so much in bloom I opted to play in the garden with the camera this morning. I've been shooting and working from RAW for quite sometime now for a lot of reasons. Adobe's CS5 has some really powerful tools for taking that RAW file and getting it ready for use in photoshop with nominal adjustments needed. The advantage to this is that you are using all the data captured at the time of the shoot and have it available for use as needed.

Anytime you have an uncompressed file you have more to work with which helps. Of course to get it to fit here in downloadable fashion I do have to resize and reduce the dpi and save in jpeg fashion which unfortunately compresses out a lot of detail. In the end you get here a flavor of the final image, the real deal needs to be seen in person for the full effect.

The two roses are among my favorites in the garden. The pink one is "Shropshire Lass" that is a beautiful single rose that blooms just once a year. The yellow is my favorite of all the yellows out there. It too is a David Austin English Rose, and is named "Golden Celebration".

Thursday, May 13, 2010

Playing with paint brushes...


I'm intrigued by the variety of tools in paintbrush, specifically the "mixer brush" that allows you to pick colors from a background and paint on a new layer pick up "paint" or color from the underlying layer and mixing.

This image was worked with the mixer brush and using several different samples of color to fill in the sky and buildings for a painterly effect. I like these tools.

I think if I'm going to do anything bigger or more dramatic will have to invest in a tablet and stylus as doing this with a mouse is very tedious work.

Wednesday, May 12, 2010

RAW fun with Adobe CS5


Am enjoying the use of the RAW tools available in CS5. Much better than what came with the camera. I have to remind myself that the camera's program is 5 years old and programming and technology has grown in leaps and bounds since I bought the camera. This program has certainly breathed some extended life into the use of this camera body.

Enjoy the fish sculpture shot at the Santa Monica pier.

Tuesday, May 11, 2010

"smart content" really does fill in when objects are deleted


So here we go...I wanted to test the "smart content" option on the healing brush and use of magic lasso to delete objects but let Adobe CS5 fill in the missing object on its own. Beats the heck out of the old days where one would delete an object and have to use clone/copy to fill in the hole with something else in the picture then try to blend it in with brushes.

This is a pretty severe before and after. Can you count how many things I removed? The wall between photography and digital art has been broken down even further! (The images do get a bit bigger to see the differences and how well smart object worked. There was very little cloning and paint work needed on the edges for clean up which is a testament to the programmers abilities.

Removing "Ghosts" from HDR files....


Wow. Just wow. Finished the tutorial regarding HDR ghost removal as well as the one on "surrealistic" options. CS5 is just amazing.

Now, please don't get me wrong, but the ability to remove ghosts is as important as keeping them in. Why...solves out of registration issues. The plus side is if you want them there you can keep them there by simply not checking the remove ghosts box...that way objects in motion can remain in motion as a blur and ghosted if its important to the image.

This file was one I knew that had a lot of loops to toss at CS5 to see how well it would handle a variety of issues. Simple drop downs and I had a "surreal saturated high contrast" image and the ghost tool removed the moving cars that otherwise were blurred headlights streaking by. Changes the whole feel of the picture to have cars simply frozen in time and the blurs removed. It was just an experiment, but I liked the results.


Sunday, May 09, 2010

reworking a prior in CS5


I do believe am going to love the toolboxes in CS5. This gem started as a Photomatix generated HDR file but I did the tone mapping in CS5. Ultrareal was the approach and I liked it.

I have to admit I have a little OCD when working my files. I save each step of the way and code the step so I can go back to any point in time whenever I want to redo an image. That way I have a standardized start point and can rework the file until I have an image I like. Could explain why I filled up a terabyte external drive so fast....multiple files of the same starter image. Pays to back up externally as well as on DVD, just in case you have a multiple drive failure you still have a way to retrieve old files.

Sadly...the new machine doesn't have a "floppy drive" and I didn't back up any of the old files on floppy, but then again I doubt that I'd have much use for under 1megapixel files.

Friday, May 07, 2010

HDR in CS5


This part of the program has grown considerably...especially in the area of out of registration corrections. I can only imagine the programming that went into that one. But in short if you have something a little out of registration, like tree limbs or flags moving it will fix the problem by letting you select the frame that will serve as the master for registration purposes. Wow.

I'm not entirely convinced that the tone-mapping is as developed as that in Photomatix, but then again I haven't dug far enough into the program to see what I can do. So far working a "real" image as opposed to "surreal" the work is much easier to fine tune. Maybe its just an issue of figuring out which tool corresponds to that in Photomatix for the surreal effects? Nah, its never that easy.

Another tool I like so far is the "Auto tone" for minor color correction, I haven't thrown any curve balls at it yet like multiple light sources, but what I have done so far is use it to clean up the cyan cast that one gets with HDR file generation. It works well for that. Of course they have full photo filter layer correction available but its nice to see what it can do automatically before you start strolling down the custom paths.

CS5 and Black and White


Wow...the CS5 controls black and white so much better than the old CS2 which simply desaturated. This program handles the file as if it were really black and white to start with and gives preset options to control the effect of filters on silver, contrast filters on the photographic paper. The works. Even better than the presets that were on the "Virtual Photographer" plug in I used with CS2. Dudes...you did your homework nicely.

Enjoy "Monrovia" our old rail station soon to be rehabbed as a Metro Gold Line station in the coming years. The actual image will be available for auction at the Monrovia Association of Fine Arts big fund raiser the "Black Tie Event" on 5/15.

CS5 Arrived...and it really is an amazing program


IT still works like the old programs in terms of menu changes. The "magic healing brush" does an amazing job of deleting objects. In this case a big old sign in the middle of the picture.

The image was shot several years ago with an Olympic point and squirt 2.5mp camera...can you imagine that being state of the art? Ever? Anyway it was just random shooting in the early morning hours and I liked the composition just not the sign warning to stay alert due to a nearby prison.

I dug this out and took it upon myself to use the magic healing to remove a sign and then ortonized the whole image. Thank goodness I didn't have to learn new tools and what there was was so intuitive it really was nice.

Enjoy "Jalama Beach Dunes".