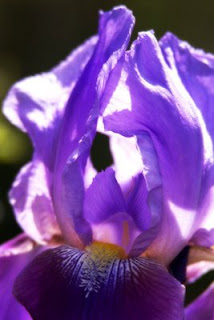
Among the garden flowers I think the Bearded Iris, sometimes called the "Siberian Iris" is the most attractive if not outright sultry and sensual. I love the deep rich blues and purples contrasting with the yellow "beard". All told its pretty risky business for a "g-rated" blog.
This lovely was done in the Orton style. I'll give you the steps I used to get to the final image.
The image was shot bracketed to allow for the dark backgrounds and sunlit petals. Turns out the 1 stop over was the better exposure to work with from RAW so there was the starting point.
In photoshop open your RAW file and do what you need to do IE exposure fine tuning, color and light temp balancing and contrast. When you have an image you like create the new file. From that file "Duplicate image" and give it a name. Close the original file to prevent accidentally working it and losing the original data.
From the newly named file go to "Layer" and create a duplicate layer. That is automatically labeled background which you can leave as is.
With the new layer go to Image, adjustments and chose the exposure tab. Increase the exposure by a factor of 1.
The next step is to go to Image, adjustments, saturation and adjust your saturation upwards.
The next step is to add the blur to the layer. To do this go to Filter, Blur and chose Gaussian blur. Blur by a factor of 10-25 pixels to get to a blur that suits your eye. I generally am in the 15-18 range and this one was 15 pixel blur.
From this point use the blending tool to determine how the final blending will look. I used Multiply and typically do. However, others such as saturation and linear burn turn up some pretty interesting results, in short experiment until you get the one you want.
Save the entire file as a PSD file at this point.
Now take this file, go to layer and hit merge visible. Fine tune your levels manually by going to image, adjustment, levels.
At this final point you "save as" with some sort of notation like v2 after the name as a jpeg file that you can publish or use to work with in other files.
This image had one additional step to give it the old 'chrome look printed on cibachrome by running it through Virtual Photographer.
Enjoy the image, use the steps at will to create your own "Orton style" images.


