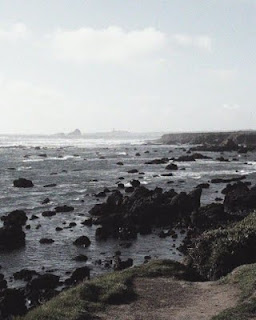
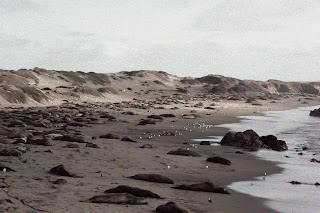
I like these images, you will need to click them to make them bigger to get full effect of the images. Of course the originals were done on either 4X5 inch or in extremely rare cases 8X10 inch glass plates you do get a good feel for the originals. What I can't duplicate so far is the black outlines around the individual color grains that the originals had, but even without these are fairly close to what the Autochromes did with the subject they were recording.
I've been working on this pretty non-stop the last few days from stock images as it has been so nasty smokey and sooty outside because of the fires. Can't really go out and shoot anything in these conditions.
A lot of the steps taken in getting the image to the final for presentation come from personal taste and knowledge of what an original autochrome looks like. (I've seen them only a few times in exhibitions). The process and steps I have been using to get the results in CS2:
- Open and duplicate the image file you wish to use. Close the original and work from the copy only to protect the integrity of the original file.
- Go to adjusments->saturation/hue and reduce saturation by a factor of -25 to -40.
- Go to Layer->new adjustment layer ->channel mixer->ok dialogue box -> click monochrome in the final dialogue box.
- In layer box click on background box. Hit CTRL+Alt+J. The new layer dialogue box that comes up label it "noise" and in mode drop down chose "Color".
- Go to Filter-> noise ->add noise-> check gaussian blur ->chose factor of 20%
- Go to Filter->blur-> gaussian blur and chose factor of 7 to 10 pixels
- Go to Filter->pixelate->mossaic-> chose cell size of 7-10.
- Go to Filter->pixelate->pointillize->chose cell size of 7-10
- Go to Layers bar, click on channel and go to the blending bar. I typically use "Soft light" or "Pin light" for the blending that produces the most accurate feel of an Autochrome, but others can work well too. Both of these images I used "soft light".
No I hope with this set of instructions I've helped prevent someone from reinventing the wheel. Should I figure out how to outline the individual "grain" cells in black I'll post it here.


