Friday, March 25, 2011

back in the silver saddle again


Did it. Yesterday I loaded up on film and the stuff to process it myself.

Until they were gone I didn't realize how much I had become dependent upon things like auto-metering, exposure and focus. Silly me it took me a few times to get back into remembering to meter each spot, decide what will be a "neutral" 18% gray (recall am a zone system kinda guy) then proceed to frame and focus.

Yes, focus what a chore that turned out to be given my aging up close vision and slight breeze moving things up close in and out of range. I may check focus points in my DSLR and even switch to manual focus often to zone in on one particular spot but its not often I have to resort to that. When I do the DSLR has built in diopters that correct my vision so its not even a major problem.

Doing my own lab work came back very quickly. Funny how one never forgets the agitation routine nor smell of things. I must admit I love the heady aroma of a freshly cracked open can of film, I think I can pass however on the odors from the chemicals themselves.

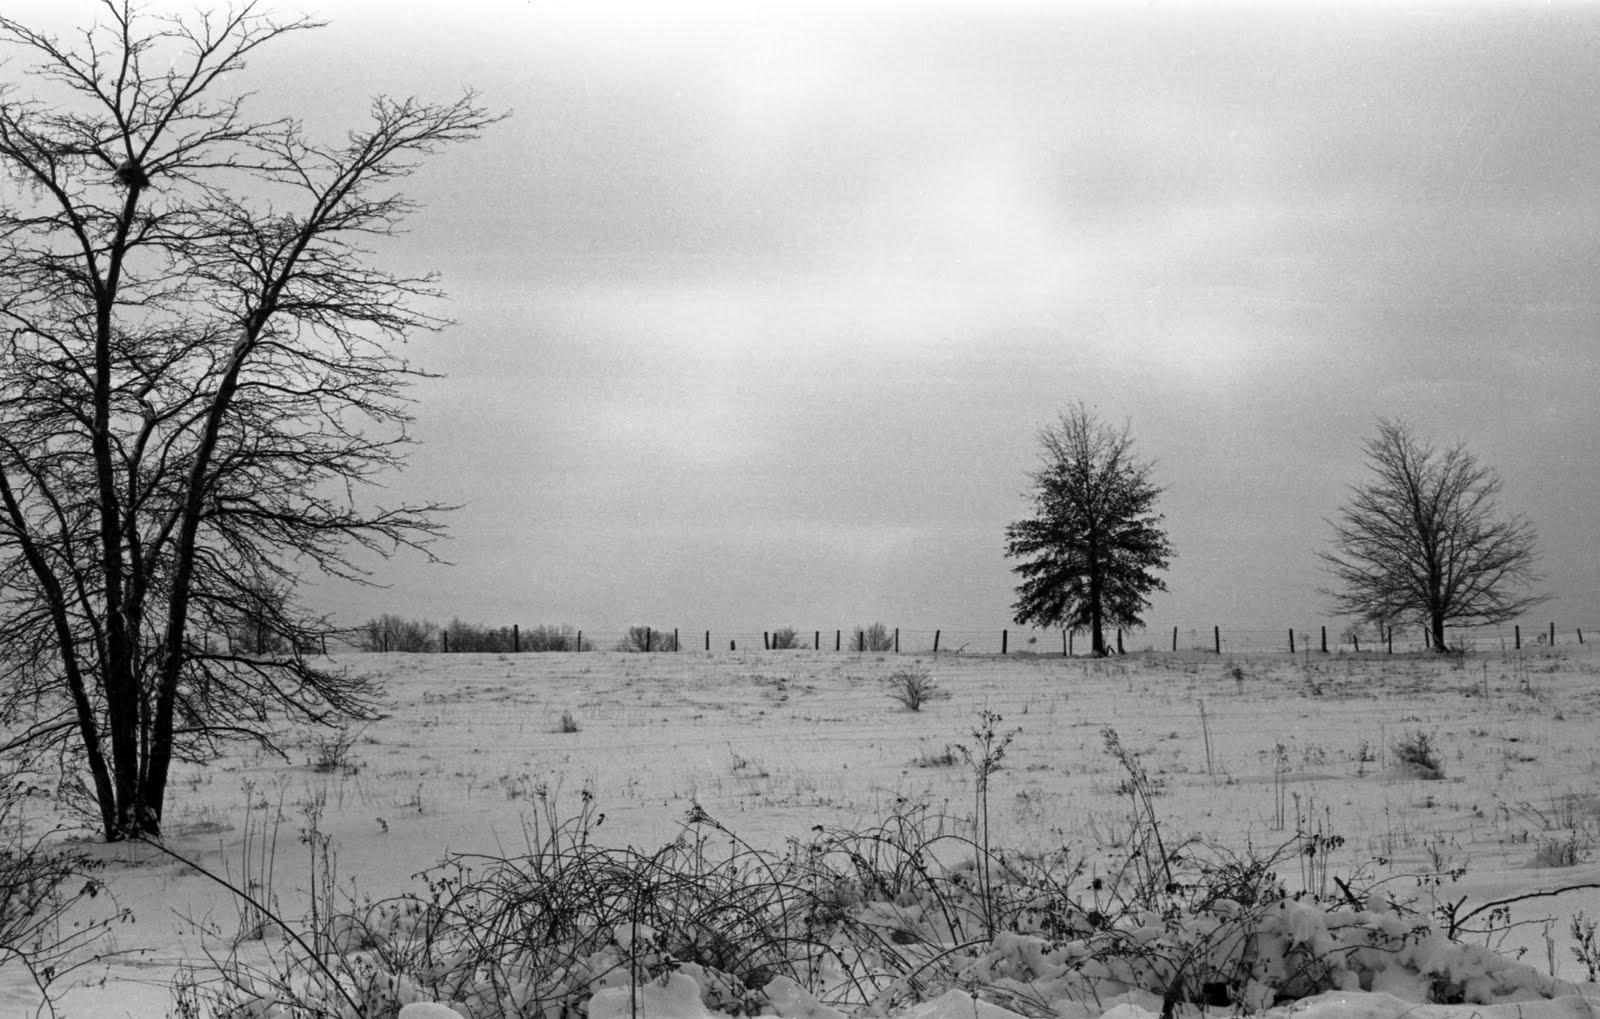
Enjoy a few from yesterdays test run. Note the water drops on the rose, that pure floral porn! It was shot on Tri-X, iso 400, developed in D-76. I must admit I do love the shades of gray it can record much better than what digital does. Doesn't appear to lose much if anything in the process of scanning to digitize them.

Thursday, March 24, 2011

Mixing chems like a mad scientist and a poem


OK, I finally did it. I found the chemicals I needed in a store in Pasadena. They don't carry the biggest selection and a lot is non-Kodak but they at least they carried my favorite "D-76" developer still. I was mixing like a mad scientist in my kitchen all I needed to do my first roll of B&W in I don't know how many years.

While mixing the chemicals I was rousting through my box of tanks and stuff and found a recipe box full of interesting stuff for developing film as well as this nifty poem that I had copied from somewhere along the line of my meanders. It is as follows:

I take to my darkroom out of affection for others.
There I make friends with the world again.
There I learn to look away, to focus on infinity.
There I play god with film, paper, chemicals and lenses.
There, in the dark, I begin to see.

Not sure why it moved me enough to type up on a 3X5 index card all those years ago when I started the reference kit in a recipe box. Its still appropriate for the digital age to a degree though we likely can remove the part about seeing in the dark, and change it up to somehow include the PC.

All that aside I got myself set up to start shooting and doing my own B&W film again. Opted for the ever faithful Tri-X Professional because I've always loved its visible grain structure and ability to capture stuff in low lighting. I even drug out my ancient, and I do mean ancient 35MM camera that is absent any form of a bell or whistle, even the built in meter died while in storage. No loss as I rarely used it and more heavily relied upon a spot meter which I still have that works quite well.

Man the torpedoes and launch the "Zone System" film photography here I come. Again.

Wednesday, March 23, 2011

So maybe hell froze over?


I knew that digital photo has taken over to the point it killed off my beloved Kodachrome and I even took partial blame.

But I never would have dreamed that it has nearly killed off the Black and White darkroom. But it has, hell has nearly frozen over as it is next impossible find Black and White chemicals in LA. None exist in the SGV area where I live and only a couple remain in LA proper. I'd ask "wahappened" but I already know. Sheesh just as I'm about to return to film it becomes hard to do so.

Pic is of my first car, crusted in ice after a winter storm. Thank gawd above Sunny LA has never frozen over like that or I'd need to find a warmer place to winter. (This was scanned from a negative from back in the day and now serves as me desktop to remind me why I hate winter).

Wednesday, March 16, 2011

What should I call it?


I see people using old school photography, you know the kind that uses real film, referring to it two different ways. One is silver based, another calls it analog.

With my reborn interest in doing film and scanning negatives I do need to come to a decision. What say you in the great debate on giving it a name, should I refer to it as "silver based", which it is or "analog" which isn't technically correct and more appropriately applied to old school TV and record recording which took information and converted it to a wave form that an appliance would covert back into visual or audio stimuli for the old nervous system. What say you in this great debate?

Today's image really underscores my Ansel Adam phase which shall be reborn shortly with negatives I scan. This is from an original negative that is well preserved from its original shooting date, dare I admit it was nearly 30 years ago? I love the detail from the shadows to the clearing sky...shot it zone system and developed for the shadows if notes serve correctly. Great testament to the longevity of the old silver based films from back in the day.

Tuesday, March 15, 2011

How people find me makes me laugh


Todays number one viewed flickr image isn't arty or about cars. It involves two ceramic sculptures a kid chose for her room and painted over at the Paint N Play art studio a while back. It made me laugh and I just posted in flickr and forgot about it. Until now.

Turns out the number one viewed image today got to be that way from a google search "penguin and pumps". Seriously, no views in the couple of years its been up and suddenly today that goofy google search lead to 14 views of the image.

Silliness abounds. Thats a good thing.

Monday, March 14, 2011

Adobe can only do so much...


Playing around with Adobe's photoshop CS5 again for a bit this morning. Playing=experimentation in my book.

Similar to yesterdays selective coloring, I did the same today. I worked on adding selective color to change the mood and feel of a scanned black and white negative. I worked with the "paintbrush" tool that adds color and blends in the existing details together. Not quite what I want, I really miss the old spray can tool that applied color over the image without muddying in the existing image. In the end when you use the blending tool you do get some of the details back so all is not completely lost, but I'd still rather not have that mushing up of details with the color chosen so you get a little more purity of color.

Of course all of this will be very moot in the next few days when I go retro silver and start using real negatives for my exploration in added color.

Sunday, March 13, 2011

A little play with selective color....


Playing in photoshop today simply because I don't have my "darkroom" stuff put together yet to revert back to old silver based black and white for my next manic round of experimentation. This image is a hint of things to come. Selective coloring where I will actually use felt tip markers to paint in color on a black and white negative. Yes, am going retro with traditional silver based films for the next big thing in my little artistic world.

This image started as a black and white negative. To get where it is now it took a few steps. I started with a scanned negative. Next I created a layer in Adobe CS5. With that layer changed its mode from black and white to RGB color.

Next step in the process was to select a color, I chose a medium blue. I took the brush tool and use the diffused edge in the largest pixel count I could get. I then painted in the sky towards the horizon line, but not covering the line to allow some areas at that line not to have color. Blending as a painter would. Once that was done I used the blending tool, "Multiply" to allow the two layers to show through each other. I ran through the gamut of blending options and found "Multiply" gave me the sort of mood I was looking for compared to the original image.

The final was then flattened for a smaller file, which was re-sized and made smaller via jpeg compression so it would easily be transferred and viewed on this blog. (The image will get bigger with a click).

Of course no amount of photoshoppery will make a bad image good. In this case I did like the composition highlighting the mound of the chat dump at an old glass factory near Flat River, MO. I just couldn't bring myself to take perfectly good old negatives and take magic markers to them for the sake of experimentation hence the use of photoshop today.

Another thing I didn't do was clean up the scan but getting rid of scratches, dust and other imperfections. I felt that it lends a certain amount of authenticity and age to final image. Whether I allow the same imperfections to show through in the future works purposely shot on silver remain to be seen. Never know what sort of mood I'll be in when I start selectively hand coloring in areas.

Wednesday, March 09, 2011

Talk about stepping outside the box


I got the wild idea while in college to color in black and white negatives with felt tip markers for printing on color paper. I used opposite colors, cyan for red, blue for yellow etc., on the emulsion side of the negative and would print on color paper. It was a total pain in the butt trying to get the grays to print neutral without the orange cast of a traditional color negative but I persevered and got them to work.

Flash forward more years than I care to admit and I discovered these negatives while I was digitizing and archiving some of the early work that was important enough to keep in this realm. Imagine my surprise and outright glee when I found them and remembered the process. Of course now with our new technology scanning them in "48 bit color" instead of trying to print on paper that needed the orange cast of a kodacolor negative its all done automatically. Love it.

I just may have to break out the darkroom equipment and start shooting in black and white again to continue this experiment. Of course I will be scanning the negatives, not printing them as I don't have a place to set up a darkroom.

Tuesday, March 08, 2011

Dramatic skies in black and white


So my love of a dramatic sky, whether it be deep deep blue in hue or cloud filled and angry can be date quite a ways back.

Somewhere along the line in my Black and White work I wanted more than what the film could do on its own.

First I tried polarizing filters and that helped to a degree to darken the sky on a cloudless day, but it wasn't quite enough.

I opted to purchase a deep red filter for the camera. This accomplishes many things with a panchromatic film...one that is sensitive to all colors equally. First darkens things opposite of red on the color wheel like greens and blues, secondly it lightens reds and its neighbors like yellows all of which contribute to a more dramatic image than simply shot without a filter.

These were shot at and near the Split Rock Lighthouse on Minnesota's shore of Lake Superior for an "general magazine" assignment for my "C&P 408" class back at SIU-C.

An interesting trend I noted in my images from the beginning of college to the end is that I relied less on cropping and shot with full frame in mind more in my senior end. Blame it on my fine art photo friends and their "full frame society" that they had than anything else.

Monday, March 07, 2011

College was for experimentation...


When I was in college I opted to go a different route in my shooting as well as in the labs. Instead of "subtractive" color printing where one used filters of like colors to subtract out colors in the final print for one that was balanced I opted for "additive". In additive one exposed each layer of the paper by using a deep colored red, yellow or blue filter between the enlarger and paper. A bit more time consuming, but in my opinion yielded much richer color from the old kodacolor or ektacolor pro films I was using at the time.

I even took the "additive" filters out into the real world with me shooting. I'd take a big honking 4X5 view camera out and with those same filters shoot black and white images through them one at a time yielding 3 negatives, one for each filter. Then I'd print them, on color paper one negative at a time through the corresponding filter I shot it with, often frustrated as hell with getting registration right, until I got a final image.

This image was done with the additive filters as well. Instead of shooting black and white I had shot with kodacolor. It was a long time exposure and I inserted the additive filters, one at a time in front of the lens with the shutter held open for several minutes total. As each color was inserted I'd use a light to "draw" outlines around the model and "flash" them with a strobe. It yielded 3 different colors of light drawing on one film, yet the total scene was in approximate accurate color, or as accurate as one could get given the multiple color of light sources illuminating the scene. Of course I had some wild color shifts until I learned how to meter and gauge how much time was needed in order to expose each layer of film and yield a fairly accurate image. Crazy the things we think of and experiment with while in college...but that is what those years are for, right?

Sunday, March 06, 2011

What we don't do to get through college


Its seems like a million years ago sometimes, other like it was yesterday. This image was one I shot to for a portfolio to get me into more advanced classes at SIU-C. But to get that education I had to do hard labor in the summers at the taconite plants in northern Minnesota.

I remember this place and taking this shot well. This is what greeted us each day as we walked into the pellet plant on our way to our designated work areas. Safety was always a concern as with all the conveyor belts, open walk ways and furnaces there were ample ways one could be injured if you didn't keep your wits about you.

This image was shot in the National Steel Pellet Plant in Keewatin, Minnesota the summer I had worked there. I had gotten permission to do a little shooting after my shift from a friend of the family who just happened to be the plant manager. I shot this after I had finished my graveyard shift and was too tired to shoot much...but I did have my locations scouted in advance and this was one I had really wanted to shoot.

I shot it on Kodak's Tri-X pan at normal ISO for better contrast and tonal control developing it in Kodak D-76 developer. This image is from a scan of the original negative done with the help of an Epson V600 photo scanner.

Saturday, March 05, 2011

A little Black and White work from the Soulard Market


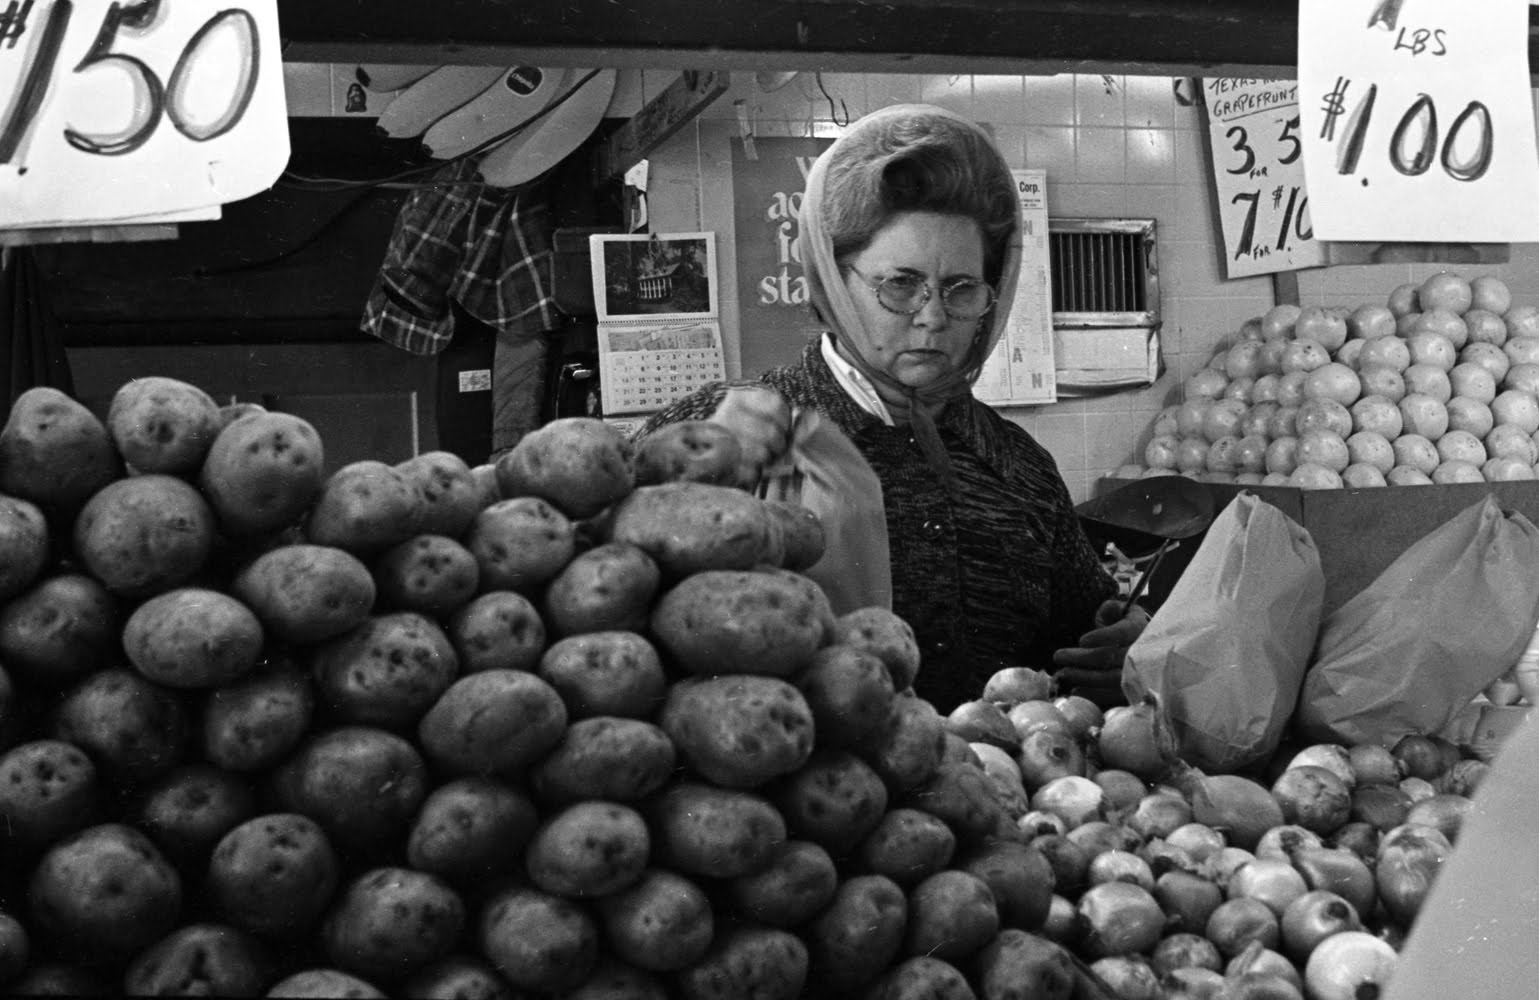
I remember this shoot quite well. The assignment was for a publications class I took at SIU-C. We were to take documentary type portraits for a "Sunday" type publication. Rather than opt for local to the school photo ops I decided to have a little road trip and go to the Soulard Farmers Market in St Louis.

The Soulard Market is the oldest continuously operating farmers market west of the Mississippi River. It was set up near the banks of the river in 1838 and has operated on that spot since its inception. A little more history HERE.

I kept pretty detailed records back in the day so I know a bit about these images. They were shot on Kodak's Tri-X pan film at its normal ISO of 400 and developed in D-76. I've kept them sleeved in archival pages since they were processed so they are nearly as good as the day I developed them. Even the "contact sheets" that were for each page are attached still after all these years so my life is so much easier picking which strip to scan.


Friday, March 04, 2011

A little fog in the morning


This old "chrome" as in Kodachrome is actually an ortonized image. You know what I mean, one sharp focused and perfectly exposed with one that is over-exposed and out of focus overlayed and printed together. Except this time instead of printing it was simply scanned and the two were married that way.

Call it old school orton but it still works. Interesting to me at least to see how the divergence from purley commercial photo dove into the fine art stuff even when I was in college.

Did I tell you how much I love my new Epson V600 scanner? It can scan up to 12800 dpi from a 35mm film yielding files in the 35-50meg range or higher depending on the detail in the neg or chrome one scans.

Thursday, March 03, 2011

Arrested Decay...the early years


Even back when, I was a fan of arrested decay and interiors by existing light. Near my childhood home was an abandoned airport. It was left to simply rot and decay and I was able to sneak in for a few shots. Lucky the floors didn't give in while I was in there.

These are scans of the final prints...the negatives were lost somewhere along the line among my many moves.

Wednesday, March 02, 2011

A little in the foreground gives you depth to perspective


Its an old trick, but if you have items in the foreground your perspective as to depth and sense of place increases. I used this technique in these two images shot from the year I lived in Death Valley's Furnace Creek.

Dantes View was just a short drive, under half hour from Furnace Creek. I loved to go up there to just watch the sunset and the color of light change during that event. It was so enjoyable I made that trip many times, it certainly was relaxing to sit and watch the shadows of the Panamint Range slowly creep across the valley floor.

If you look closely the richness of color has not faded after all these years. Why? I shot mostly in Kodachrome back in the day and you just couldn't match the capability of that film with any other, at least in my not so humble opinion.

Enjoy....

Tuesday, March 01, 2011

Some things never change...like the love of a dramatic sky


I shot these while living in Death Valley in 1981. Even then the love of a dramatic sky ala the old Dutch Masters was there.


Painting with light


Back when I was in college I did an independent study program my senior year in a fine art vein instead of following the commercial path I had been on. A lot of reasons for it, chief of which was I wanted to explore my creative artistic side beyond what a commercial studio would do.

I had stumbled upon the idea of painting with light during my intro to color class and fooled with it a bit. What I did to achieve the effect was to place the camera on a tripod and leave the shutter open several minutes with a small "f" stop for max depth of field as well as allowing maximum time to "paint" with the light. The light source that I painted with varied from flash lights to sparklers. I often times lit the model with a quick flash from a strobe so that part would be properly lit so I could focus on the time to paint with the light source.

Here are just a few examples, more can be found in my flickr set called "Early color work"

Sunday, February 27, 2011

Its all about a true black....and good mid tones


Talk about a hard shot to get right, but I did. This pic of the bridge and mill in Burfordville MO was taken fall of 1977 for my Black and White photography class. It was exercise in the "zone system" as formulated by Ansel Adams...one of my long time hero's for so many reasons.

Saturday, February 26, 2011

Just a little taste of spring


Shot this in March 1976 could be dogwood. Could be forsythe. Both were the first to bloom in MO once winter was done and before the rest of the stuff was ready to go.

This is from a scan of the original negative done with an Epson V600 Photo scanner, set the dpi for a max 12800 (extrapolated) that picks up every little piece of grain. I dumbed down the images just a couple of notches so it loads faster here.

Funny how my love of things up close was there in the early work. I like how the depth of field is so shallow that only a couple of blossoms are in focus.


Friday, February 25, 2011

A few more from the archives


This is sort of fun digging into the archives and digitizing things for posterity...or at least until the next big thing comes along.

I've always loved isolating trees and showing off their individual beauty in a forest. I particularly like this set of images. They were shot in Northern Minnesota on my grandparents property on Bear Island Lake outside of the town of Ely where they lived. Can you tell from these images that Ansel Adams had an affect on me even in my early years?


Some trends go back ages...


I have a new scanner and among the tasks I have for it is to take my old B&W and archive them all digitally.

One of the things I've noticed in my early work was an affinity for natural lighting, even low level for all the drama one can get from the images shot under such conditions. Also noted that I did a lot of very moody black and white work both indoors and outdoors.

These images are of some family members that cooperated with me and my experimentation back in the day. Both are very natural portraits that I am still very pleased with many years after the fact.

Interesting for me also was my propensity to not only store them for safe keeping back then, but I also noted the basics such as film used. In this case these were shot in good old Tri-X Pan at ASA (we call it iso now) 400, no pushing was done.

Thursday, February 24, 2011

Praise be...the new scanner arrived


Can't wait to find in storage all of my negatives,not just those stashed in with the trusty High School yearbooks. This gem came from the first set I shot with my first brand new, spanking way cool 35mm camera that I bought with all my graduation gift money.

Best I could find to celebrate the arrival of my new scanner, an Epson V600 that is comes set to scan both negatives and transparencies. Should be interesting to see how it does with the old Kodachromes...will it reproduce the same rich color? Right now am pretty amazed at what it does with old color negatives like this July 4th shot done summer of 1975.


Monday, February 14, 2011

test...just a test of a new tool in my arsenal

I bought a flip cam...mostly for use over at So Cal Auto Blog the possibilities are endless. Maybe do some tutorials on stuff I do with CS5? HDR? Just random stuff like this test video that I put together fooling around with the simple tool earlier today? I don't know, what would you like to see?

Saturday, February 12, 2011

Camellia...orton style


I just love how a pretty blossom becomes oh so romanticized with the simple addition of a couple of steps in Adobe CS5.

I've done the steps numerous times in other posts this time around will skip the details on how I got there and just let you enjoy the image.

Monday, February 07, 2011

Interesting Online Gallery for me...Gallerish


So as part of my near daily quest to find new venues to show case my art work I stumbled upon Gallerish, an online gallery for Los Angeles.

Its pretty nifty, certainly is a no risk venture to show case ones art. The nice thing is that they permit linking to your own website at no extra fee. Pretty slick way for new/emerging artists trying to build a following of collectors to get some exposure. Their home page link HERE.

Of course I set up my own brief online gallery with them. You can find me HERE.

Friday, February 04, 2011

A little diversion and play time with Polaroin


Yesterday a friend turned me on to a web site called Polaroin. Link HERE. It creates Polaroid style images out of your digital photographs regardless if shot with a cell phone or DSLR.

I played around with it a bit yesterday and am having fun with it. Though I do mourn the day Polaroid dissolved itself and quit making film its nice to see it replicated with a fun online app. (I have ample Polaroid images from over the years, loved the look and feel of the images and have quite a collection of their cameras so my mourning is twofold....can't use the cameras I have and can't play with the process again in the future).

Of course it got my wheels turning and wonder if there is a point to duplicating it in Adobe's Photoshop CS5. Art for the sake of art has its purpose and I just may do so. Stay tuned....

Thursday, February 03, 2011

HDR to the rescue


This image would have been nearly impossible to capture without the aid of HDR post processing? Why you ask? Well the "wall" behind was actually a bank of white plexi that was back lit and several stops brighter than even the spot lit car. Shooting it bracketed +/- 2EV solved the problem when I used those files to generate an HDR image.

The final image was then tone mapped with Photomatix. After that it needed no other post processing 'cept for some minor color correction work.

The car is the Mistubishi i-MiEV (electric car) due on sale later this coming year. More about the car on So Cal Auto Blog.

Friday, January 28, 2011

A new Focus and a photo op

Last night I attended an event at the Petersen Museum. Ford and Jay Leno donated the Ford Focus Electric Vehicle he had used in his show last season. Link to the post about the event itself HERE.

It should be no secret by now that I love to shoot cars about as much as I love to drive them. These events are terrific for shooting cars but the lighting isn't always ideal, and I dislike the harsh look of flash preferring the available lighting any day.

The problem with last nights shoot was multiple. First the car I wanted to feature was white, under spotlights that created too harsh a contrast and zero highlight detail. That was fixed by shooting with HDR post processing in mind. Second was that because of the different light sources there was different colors of light coming into play that makes accurate color balancing by the camera difficult...shooting RAW and using Adobe's CS5 helps with the color correcting.
Of course Photoshop helps with the final processing, in this case using some filters to make the 2012 Focus Electric the center of attention by using some spotlight action to darken other areas of the frame so the key car pops out from the back ground.

In terms of HDR processing I shot this bracked +/- 2 EV. The HDR file generation used those 3 files to create the file I worked from for color correcting and filter application. Tone mapping was done via Adobe's CS5. The final image used here was then dumbed down in size and dpi so it would be fast loading without sacrifice of detail .

The final image gets bigger with a click.

Wednesday, January 26, 2011

Just a new little adventure...

I was asking for a new adventure. I got one, well made it happen. My friend Dave Share from metblogs/blogging.la have been talking for a while about doing a car blog. We made it happen over the last few weeks.

You can visit So Cal Auto Blog and leave comments or whatever. I'd really like it if you'd click on the ads from time to time as it helps us build credibility with them beyond content.

The banner was made by me from an image of a Mustang Bullitt I shot a while back. Cropped it down and added text with Photoshop...and then sized to fit within the spot allotted in word press. Stupid easy and nice results.

Sunday, January 16, 2011

Stuff


I worked this image from 3 bracketed images into an HDR file then took it a step further and ortonized it. In short I needed a dreamy looking image for a post I was working on for blogging.la that ran today. I was pleased with the outcome.

I'm hanging in Monrovia City Hall through March 31st. I was hung (figuratively, not literally but am sure there are a few that would like to blur that line) this past Wednesday. I need to get a shot in of my work hanging in the "City Lights" gallery as it is called in city hall. When that has been accomplished will post it here too. A little bragging, but what good is a blog if you can't do your own self serving post every now and then.

Tuesday, December 21, 2010

Just a little break in the rain


I've found through trial and error that a low res camera is just as good as a high res when it comes to producing orton style images. This quick image was grabbed with a cell phone of all things and worked in the orton style.

Love the impressionistic view of the world an orton style image produces.

To get there you make a duplicate layer, increase the exposure, slight increase to the saturation, and finally give it a little blur via the gaussian blur filter in Adobe Photoshop CS5. Then you take the layers and give them a multiply blend and voila you have your own orton style image.


Wednesday, December 01, 2010

Sold to a collector...has such a nice ring to it.

It has an even nicer ring to it when its a repeat customer and is more than 2 pieces, especially in this tough economy. Funny how the same person takes unrelated pieces.
Roses
Before Electricity