Tuesday, March 01, 2011

Painting with light


Back when I was in college I did an independent study program my senior year in a fine art vein instead of following the commercial path I had been on. A lot of reasons for it, chief of which was I wanted to explore my creative artistic side beyond what a commercial studio would do.

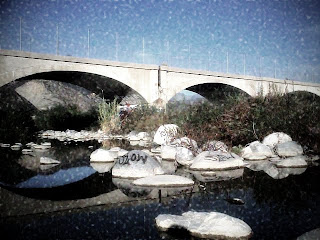
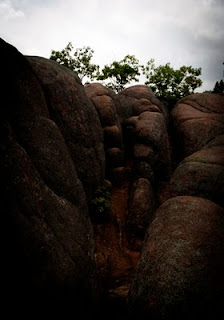
I had stumbled upon the idea of painting with light during my intro to color class and fooled with it a bit. What I did to achieve the effect was to place the camera on a tripod and leave the shutter open several minutes with a small "f" stop for max depth of field as well as allowing maximum time to "paint" with the light. The light source that I painted with varied from flash lights to sparklers. I often times lit the model with a quick flash from a strobe so that part would be properly lit so I could focus on the time to paint with the light source.

Here are just a few examples, more can be found in my flickr set called "Early color work"

Sunday, February 27, 2011

Its all about a true black....and good mid tones


Talk about a hard shot to get right, but I did. This pic of the bridge and mill in Burfordville MO was taken fall of 1977 for my Black and White photography class. It was exercise in the "zone system" as formulated by Ansel Adams...one of my long time hero's for so many reasons.

Saturday, February 26, 2011

Just a little taste of spring


Shot this in March 1976 could be dogwood. Could be forsythe. Both were the first to bloom in MO once winter was done and before the rest of the stuff was ready to go.

This is from a scan of the original negative done with an Epson V600 Photo scanner, set the dpi for a max 12800 (extrapolated) that picks up every little piece of grain. I dumbed down the images just a couple of notches so it loads faster here.

Funny how my love of things up close was there in the early work. I like how the depth of field is so shallow that only a couple of blossoms are in focus.


Friday, February 25, 2011

A few more from the archives


This is sort of fun digging into the archives and digitizing things for posterity...or at least until the next big thing comes along.

I've always loved isolating trees and showing off their individual beauty in a forest. I particularly like this set of images. They were shot in Northern Minnesota on my grandparents property on Bear Island Lake outside of the town of Ely where they lived. Can you tell from these images that Ansel Adams had an affect on me even in my early years?


Some trends go back ages...


I have a new scanner and among the tasks I have for it is to take my old B&W and archive them all digitally.

One of the things I've noticed in my early work was an affinity for natural lighting, even low level for all the drama one can get from the images shot under such conditions. Also noted that I did a lot of very moody black and white work both indoors and outdoors.

These images are of some family members that cooperated with me and my experimentation back in the day. Both are very natural portraits that I am still very pleased with many years after the fact.

Interesting for me also was my propensity to not only store them for safe keeping back then, but I also noted the basics such as film used. In this case these were shot in good old Tri-X Pan at ASA (we call it iso now) 400, no pushing was done.

Thursday, February 24, 2011

Praise be...the new scanner arrived


Can't wait to find in storage all of my negatives,not just those stashed in with the trusty High School yearbooks. This gem came from the first set I shot with my first brand new, spanking way cool 35mm camera that I bought with all my graduation gift money.

Best I could find to celebrate the arrival of my new scanner, an Epson V600 that is comes set to scan both negatives and transparencies. Should be interesting to see how it does with the old Kodachromes...will it reproduce the same rich color? Right now am pretty amazed at what it does with old color negatives like this July 4th shot done summer of 1975.


Monday, February 14, 2011

test...just a test of a new tool in my arsenal

I bought a flip cam...mostly for use over at So Cal Auto Blog the possibilities are endless. Maybe do some tutorials on stuff I do with CS5? HDR? Just random stuff like this test video that I put together fooling around with the simple tool earlier today? I don't know, what would you like to see?

Saturday, February 12, 2011

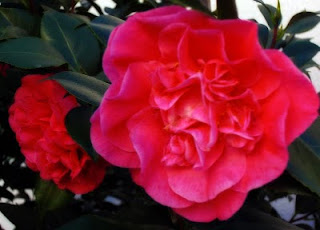
Camellia...orton style


I just love how a pretty blossom becomes oh so romanticized with the simple addition of a couple of steps in Adobe CS5.

I've done the steps numerous times in other posts this time around will skip the details on how I got there and just let you enjoy the image.

Monday, February 07, 2011

Interesting Online Gallery for me...Gallerish


So as part of my near daily quest to find new venues to show case my art work I stumbled upon Gallerish, an online gallery for Los Angeles.

Its pretty nifty, certainly is a no risk venture to show case ones art. The nice thing is that they permit linking to your own website at no extra fee. Pretty slick way for new/emerging artists trying to build a following of collectors to get some exposure. Their home page link HERE.

Of course I set up my own brief online gallery with them. You can find me HERE.

Friday, February 04, 2011

A little diversion and play time with Polaroin


Yesterday a friend turned me on to a web site called Polaroin. Link HERE. It creates Polaroid style images out of your digital photographs regardless if shot with a cell phone or DSLR.

I played around with it a bit yesterday and am having fun with it. Though I do mourn the day Polaroid dissolved itself and quit making film its nice to see it replicated with a fun online app. (I have ample Polaroid images from over the years, loved the look and feel of the images and have quite a collection of their cameras so my mourning is twofold....can't use the cameras I have and can't play with the process again in the future).

Of course it got my wheels turning and wonder if there is a point to duplicating it in Adobe's Photoshop CS5. Art for the sake of art has its purpose and I just may do so. Stay tuned....

Thursday, February 03, 2011

HDR to the rescue


This image would have been nearly impossible to capture without the aid of HDR post processing? Why you ask? Well the "wall" behind was actually a bank of white plexi that was back lit and several stops brighter than even the spot lit car. Shooting it bracketed +/- 2EV solved the problem when I used those files to generate an HDR image.

The final image was then tone mapped with Photomatix. After that it needed no other post processing 'cept for some minor color correction work.

The car is the Mistubishi i-MiEV (electric car) due on sale later this coming year. More about the car on So Cal Auto Blog.

Friday, January 28, 2011

A new Focus and a photo op

Last night I attended an event at the Petersen Museum. Ford and Jay Leno donated the Ford Focus Electric Vehicle he had used in his show last season. Link to the post about the event itself HERE.

It should be no secret by now that I love to shoot cars about as much as I love to drive them. These events are terrific for shooting cars but the lighting isn't always ideal, and I dislike the harsh look of flash preferring the available lighting any day.

The problem with last nights shoot was multiple. First the car I wanted to feature was white, under spotlights that created too harsh a contrast and zero highlight detail. That was fixed by shooting with HDR post processing in mind. Second was that because of the different light sources there was different colors of light coming into play that makes accurate color balancing by the camera difficult...shooting RAW and using Adobe's CS5 helps with the color correcting.
Of course Photoshop helps with the final processing, in this case using some filters to make the 2012 Focus Electric the center of attention by using some spotlight action to darken other areas of the frame so the key car pops out from the back ground.

In terms of HDR processing I shot this bracked +/- 2 EV. The HDR file generation used those 3 files to create the file I worked from for color correcting and filter application. Tone mapping was done via Adobe's CS5. The final image used here was then dumbed down in size and dpi so it would be fast loading without sacrifice of detail .

The final image gets bigger with a click.

Wednesday, January 26, 2011

Just a new little adventure...

I was asking for a new adventure. I got one, well made it happen. My friend Dave Share from metblogs/blogging.la have been talking for a while about doing a car blog. We made it happen over the last few weeks.

You can visit So Cal Auto Blog and leave comments or whatever. I'd really like it if you'd click on the ads from time to time as it helps us build credibility with them beyond content.

The banner was made by me from an image of a Mustang Bullitt I shot a while back. Cropped it down and added text with Photoshop...and then sized to fit within the spot allotted in word press. Stupid easy and nice results.

Sunday, January 16, 2011

Stuff


I worked this image from 3 bracketed images into an HDR file then took it a step further and ortonized it. In short I needed a dreamy looking image for a post I was working on for blogging.la that ran today. I was pleased with the outcome.

I'm hanging in Monrovia City Hall through March 31st. I was hung (figuratively, not literally but am sure there are a few that would like to blur that line) this past Wednesday. I need to get a shot in of my work hanging in the "City Lights" gallery as it is called in city hall. When that has been accomplished will post it here too. A little bragging, but what good is a blog if you can't do your own self serving post every now and then.

Tuesday, December 21, 2010

Just a little break in the rain


I've found through trial and error that a low res camera is just as good as a high res when it comes to producing orton style images. This quick image was grabbed with a cell phone of all things and worked in the orton style.

Love the impressionistic view of the world an orton style image produces.

To get there you make a duplicate layer, increase the exposure, slight increase to the saturation, and finally give it a little blur via the gaussian blur filter in Adobe Photoshop CS5. Then you take the layers and give them a multiply blend and voila you have your own orton style image.


Wednesday, December 01, 2010

Sold to a collector...has such a nice ring to it.

It has an even nicer ring to it when its a repeat customer and is more than 2 pieces, especially in this tough economy. Funny how the same person takes unrelated pieces.
Roses
Before Electricity

Tuesday, November 23, 2010

Cars, Cars, Cars....love 'em to drive and shoot


I love cars. Without a doubt many of those machines are just beautifully engineered and sexy to the eye as well. Getting a press pass gives one uninterrupted access to cars during the LA Auto Show and I wear myself ragged during the show.

To get this shot I did a few things, including a departure from normal...added in some elements. The car is the Mercedes Benz CLS 63 AMG which is drop dead gorgeous. I bracketed the shot to get the exposure right, then added in some spotlight and lens flare effects to frame the car better from its surroundings.

To save you the google searches my primary posts on blogging.la are HERE and HERE. My entire set of raw images from the LA Auto Show are in a set in flickr, appropriately titled 2010 LA Auto Show.

Tuesday, October 12, 2010

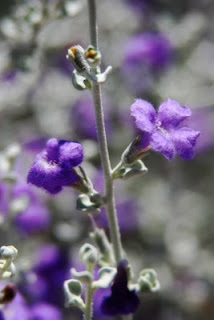
Desert Heather...ala Orton


I still am always amazed how much easier and faster it is to create with a pc vs silver based material. Orton wasn't that hard of a process, but it was time consuming getting the color balanced and exposures down when trying to print through doubled up slide film. Adobe's CS5 makes it all the easier.

As a refresher Orton was a guy back in the 70 who would do two shots of the same subject on slide film. One was razor sharp and perfectly exposed, the other was out of focus and over-exposed. The two were sandwiched together and printed resulting in a very surreal in focus/out of focus with artifically saturated colors.

To achieve this in Adobe the process is similar in theory. You take one sharply focused and exposed file. You open it and duplicate a layer labeling it "Background copy".

With that copy you go to Image>Adjustments>Exposure and increase your exposure by a factor of 1-2.0 so you "blow out" or lose all highlight detail. Got to Image>Adjustments>Hue/Saturation and increase the saturation by a factor of 10-30 depending on how the changes look to you.

The next step is go to Filters>Blur>Gaussian Blur and chose pixel range of 10-25 depending on the amount of blur you need. Less if you have an already blurred background, more if you don't.

The final step is go to the adjustments box on the side margin and select "Multiply" as your blending option.

There you go a few simple steps for recreating the look and feel of the old silver based "Orton effect" images.


Monday, October 11, 2010

Piled Higher and Deeper in Venice Beach


I love the insanity of this camper. So much stuff they had to bring along a mini-van to hold the extra. I have no idea what the story is behind this is, but that festive banner flying on the main camper tells me this is a fun crowd not some down and out of luck scenario.

The image was shot purposefully with HDR file generation in mind by bracketing the exposures 2 stops +/- from average. The HDR file generation was completed with the help of Adobe's CS5 that I also used for the tone mapping. Tone mapped for max saturation and definition between the various shapes so it took on a lot of blocks of color emphasizing the surreal nature of the setting itself.

IT will be in the satchel of goodies for you to peruse at this coming Thursday (10/14) Artists Reception at Bolt Barber's in Los Angeles. For those that forgot the details it is set for 7-9:30PM at Bolt Barbers, 460 S Spring Street (5th and Spring) Los Angeles CA.

Saturday, October 09, 2010

Shooting in low light doesn't always need HDR or a Flash to work

Shooting with just the existing natural light is a challenge. First you have to decide how much detail and noise you are willing to accept for a higher ISO. Why the higher ISO need...you don't always have the benefit, or permission even, to use a tripod let alone "brace" yourself on something if you are in a museum or similar setting. The higher ISO allows for a faster shutter to eliminate camera shake, but it does so at the expense of image quality as the ISO climbs.

Bracketing is the salvation of shooting with a window providing the light.

Thank goodness for tone mapping being able to be applied to an image to bring all tones captured into range that can be displayed on your screen or printed image material.

For this image of the captain's desk on the Queen Mary I didn't have the benefit of being able to use a tripod or brace myself on something. I knew I was good for relatively slow shutter speeds (1/10 second) so I set my ISO at a moderate 800 and bracketed 1 stop each way from metered.

The final image was cleaned up for color balance, a bugger when you have sunlight streaming in from a window coupled with regular incandescent lighting through the use of Adobe's CS5 color tone and color filters. After that was done the image was tone mapped to bring down the bright window to a more acceptable level and bring in some more of the shadow details. Low light image rescue completed.

This won't be among the images at Thursdays Bolt Barbers Gallery Reception. There will be ample images on the wall and in my trusty satchel for you to peruse. The gallery is located within Bolt Barbers, 460 S Spring Street, Los Angeles CA. The reception is 10/14/2010, 7-9:30PM.

Monday, October 04, 2010

One more for the show....


Dang it all. Both printers decided to die on me in the middle of yesterdays effort to get some oldies but goodies added back to the satchel for the October 14, 2010 Bolt Barbers' Gallery reception. Alas the 'puter and art gawds aren't playing well together.

Before it died I did get one last print done. Always loved the haunting look of this image...

Friday, October 01, 2010

More of me@ Bolt Barbers Gallery

Bolt Barbers' updated their web to include some thumbnails of a few of the pieces in the show. The reception is going to be big. BIG I tell you. Why you may ask? Bolt will host Hot on Yelp's "Beauty & The Hairy Beast Event from 5P-10P. Live DJ on hand and all services will be free with suggested donation for each service to benefit The Midnight Mission.

The Bolt Barbers' Gallery link on me is HERE.

As a reminder...the reception is set for Thursday October 14, 2010 7-9:30PM. Bolt Barbers 460 S Spring Street, Los Angeles CA.

Tuesday, September 28, 2010

Just one final Autochrome....


I finally figured out the blending as noted in yesterdays post. I opted to dig out one more little image from the Che-ez Snap and autochromed it. I liked the image to start with, the graining of it all via the various layers and steps only adds to the old timey feel of the image.


Monday, September 27, 2010

Revisiting the Autochrome...


I don't know what I was thinking but I completely forgot about this treasure trove of images done with the digital camera I had called the Che-ez snap. I found the DVD's from my old Textamerica account and started sifting through them.

I've blogged about that little camera numerous times, what I never thought about was how those low res images might be the key to perfecting the Autochrome look that I wanted. Until yesterday.

These images all started as small low resolution jpegs from that camera. I went and created a few layers until I got the saturation lowered and wider grain of the Autochrome sorta duplicated with the help of Adobe CS5. What I still can't figure out how to do is outline these "grains" with black like the Autochromes themselves had. Until then I can only partially duplicate the look and feel of those old 'chromes.

To get there here is the steps I use.
Create new adjustment later>black & white. Leave blending to "normal" but set opacity to 25%.

Click on the original image and use control+alt+J to create a new layer and label it noise. desaturate the image by about 25% using the adjustment too. Go to Filters>Blur>Gaussian Blur and set the adjustment to "5" pixels. Next go to Filters>Noise>Add dust and scratches and move slider until you just have some visible dust and scratches. Final stop is to go to Filters>Pixelate>Pointillize and adjust towards smaller dots.

Click on the "noise layer" and adjust your mixing to either "soft light" or "hard light" until you get the image that you like.

Merge layers and voila your final image is now set to be saved as a pds file for further use or jpeg for publishing on flickr or similar.

Sunday, September 26, 2010

Real Toy Camera...


I had a toy camera called the Che-ez Snap. It was tiny, hardly bigger than a postage stamp. Its optics was fixed focus, with the edges being really sketchy. Color was off and over saturated. Contrast was off as well...on the contrasty side rather than flat so I liked the results, most of the time. It was all of .2, yes POINT 2 mega pixels and I loved its low Res images to pieces.

These are a few select few that are being printed up for inclusion in my goodies satchel for things to dig through (and purchase if so inclined) at my Artists Reception at Bolt Barbers' Gallery on October 14, 2010. (Details in a prior post).


Saturday, September 25, 2010

More with the toy camera...


Years ago, 2003 to be precise, before I switched from silver to a DSLR we had a little digital point and squirt for just snapshots of the kids and stuff. In retrospect that little 2.0 megapixel camera had a lot of the qualities of a toy camera, or at least a cell phone camera.

I snapped this image up on Jalama Beach on CA's Central Coast October of 2003 and found it while rummaging around for other stuff. The composition is good, the basic image is grainy to start with, pixelated colors that look like traditional film grain when viewed large and was already for a little run through CS5 to finish off the "toy camera" look that I am so enamored with at the moment.

I took the basic image and used "filters">"Lens distortion" and cranked up the vignetting, added a little chromic aberration then adjusted the curves to darken the blacks a bit and lighten up the center ranges.

Flamed and vignetted...


I love the look of the old school toy camera. I'm also a big fan of super saturated color, and to get there today I used the vignetting tools in Adobe's CS5 to get the corners adequately darkened and still keep the center light and focused. I didn't opt for the off color registrations you could get by switching up your color chemicals like you could in old school silver based media. Rather I went for the contrasty overly saturated colors and contrast one got from the old Cibachrome print material.

To get this image I opened the RAW file and used the lens correction tool. Instead of minimizing the distortion I went the other direction and maximized the vignetting and upped the barrel distortion some to further the "fish eye" look. Once done I went into the saturation levels and upped the saturation for orange and yellow a bit to make the flames "flamier". Then I hit the ok button and opened the file and continued to work it in the 8 bit mode it was converted to for PSD files.

I used the adjustments to alter the hue and color to compensate for this being shot in the early morning in the shade. Then I made one last attack on the vignetting by going to "filter">"lens correction" and bumped up the vignette to further darken the corners. I did this to put the background elements more into the shadows making the old Flamed Woody the center of attention. Then I upped the center lighting value some to brighten up the car. Once done I flattened it all with the layers tool and converted to a smaller 72dpi jpeg file for publication here.

The real image is much larger and detailed than this compressed jpeg portrays, but you still get a sense of what the printed image is like.


Tuesday, September 21, 2010

Open invitation to my Artists Reception 10/14/2010


Mark your calenders, October 14, 2010, 7PM to 9:30PM for my artists reception at Bolt Barbers in Los Angeles. The addy...460 S Spring Street (corner of 5th and Spring) Los Angeles CA. The reception will include a hosted "Candy bar"...perfect to kick off Halloween. There is no need to RSVP as this is open to the public.

It will be held in conjunction with the Downtown LA Art Walk that runs 5-10PM on that day. Be prepared for tight parking. The Hotel Alexandria at 501 S Spring Street has underground valet parking and you can buy discounted parking from the Bolt good at the hotel. Worth every penny to avoid the other more known public lots in the area.

As soon as Bolt has their artists page updated.

The curator of the exhibit, Betsy Matz designed the post cards and chose one of my favorite images to use on the card. "Abandoned Church, Paris" is one of my favorites for many reasons. Chief of which is that its proof that the greatest rewards are when we stray from the beaten path.

We were on a walking tour of the old Jewish quarter when the guide had us change directions and pointed out there was "nothing to see" down this one small street as the church there was being gutted to turn into retail shops etc.,. Fine I kept walking. We rounded a couple more corners and he pointed out again "nothing to see...." and gave the same reason pointing down the general direction we had been. I broke ranks and jogged down the half block and look what I found, this terrific old church, built in the 1500's being gutted. What a wonderful patina to the walls, the rough hewn beams and on the other side of the wall, the church's old courtyard in full spring bloom with Victorian era apartments on the other side.

I had the camera set in seconds for bracketed exposures and shot it with HDR post processing in mind. I used Photomatix for the post processing in to the HDR file and kept it adjusted for photo-realism with maximum detail in the shadows to highlights. Had I not used HDR file generation I would have had either a beautifully exposed courtyard with a blacked out church, or church detail with blown out highlights for the courtyard. Classic win/win that you can get with HDR and keeping it real instead of surreal.

See you at the reception!

Sunday, September 19, 2010

Making it look like a toy camera...


Ah, the Diana, that old school "toy camera" that launched a photo revolution for its artsy out of focus and lost edge detail was one I too played with. Not as much as the "art photographers" I hung out with at dear old SIU, I was a commercial photo guy after all and our disciplines were supposed to be at cross purposes. Supposed to be but then again I've always had a hard time staying in the lines.

I stumbled across a tutorial for recreating a "Lomo" style toy camera image today and got to thinking about my long lost Diana and the images it could create. Especially if you shot slide film and had it processed in "negative" film chemicals. The changes in saturation, contrast and a host of other things created images that took advantage of the toy cameras basic "flaws". I got the urge to start recreating those images from razor sharp digital images and see what happened.

See what happened? I took a stock shot from Elephant Rocks I shot while back in MO over the summer. I am pleased with the result.

To get this image I opened a RAW file in CS5 and used the lens correction tools. I ignored the simple corrections for axis and depth of field correction and went straight to the vignetting tool to darken the corners. From there I opened the image and did a save as jpeg so I would have a standard image to work with while experimented.

The next step was to adjust the hue and color to the most natural state I could get and saved.

Next was the "duplicate layer" and let it be labled "background layer" automatically. I adjusted the saturation to more and increased the brightness by a factor of 10, playing around a bit so I kept the corners noticeably darker without blowing out the center as too bright.

Next step was to go to blur and chose lens blur. There I made several changes. I increased the blade curvature and rotation until I got the level of blur that enabled most details to remain, just pick up an overall out of focus, softness to the layer. Specular Highlights was also adjusted, to a factor of 17 for brightness and threshold moved all the way over to 255. Noise remained at 0, distribution was kept as "uniform". From there I hit OK and the PC applied the changes.

The next step was to go to the layers histogram and chose "soft light" as the blending option. This enabled to the softness of the overall background to show through keeping the feel of a toy camera in place.

Of course the easier solution to all of this is to simply find another toy digital camera that has the same "problems" IE poor optics, cheap sensors etc., that by their nature create toy camera images with all their inherent lovable flaws. May have to do that again, imagine the fun of manipulating those images down further!

Saturday, September 18, 2010

Sistine Culvert

This started out as a decent piece of urban art. Then the taggers arrived and tagged it over so many times that it no longer was art, just a tagging piece. Interesting that they opted to work under a culvert slowly filling it up towards the ceiling almost like the Sistine Chapel. Our little renaissance artists at work?

This is an image shot bracketed with HDR post processing in mind. The HDR File was generated with Photomatix (I keep going back to it as I like it, comfort zone issue likely, but I like the fine tuning tools better still). The HDR file was then processed into 8bit and tone, color adjusted and resized for publication in Adobe's CS5.

Saturday, September 11, 2010

Couple of more from the Orton path...


So the romanticism of the orton style got to me today. It got me thinking about some of my older images and how they could be reworked in the Orton style to change the look and feel of the images. So I started digging through the archives and redid these too.

To get there I duplicated the image using Adobe's CS5. The duplicate layer was labeled "background" copy. With that layer I then proceeded to increase the exposure the equivalent of 2 f stops and then through it out of focus with the blur function. The resulting image was then blended with "multiply" to allow both layers to show through. The resulting image was then merged and dumbed down (smaller lower dpi) for easy upload and viewing.

Enjoy "Cemetary Sunset" and "Silent Yard".

Ala Orton : 1960 Oldsmobile Low Rider


I love orton and the way it gives such a soft romantic look to an image. In this case it adds to the old timey romanticism of the antique car that I spotted at a car show this morning. I loved this car and wanted to do more than just document it, I wanted impart some emotion while maintaining its sense of power. Orton to the rescue.

To get there I duplicated the image using Adobe's CS5. The duplicate layer was labeled "background" copy. With that layer I then proceeded to increase the exposure the equivalent of 2 f stops and then through it out of focus with the blur function. The resulting image was then blended with "multiply" to allow both layers to show through. The resulting image was then merged and dumbed down (smaller lower dpi) for easy upload and viewing.

Enjoy 1920 Oldsmobile Lowrider. It does click for a larger image.

Thursday, September 09, 2010

Installed at Bolt Barber's Gallery in Downtown LA


Its as official as it will ever be. I've been installed and have 15 Pieces hanging at the Bolt Barber's Gallery in Downtown LA.

The show runs through October 30, 2010. The opening reception should be tied to the Downtown LA Art Walk set for the second Thursday in October. As soon as I have the details will be posted here for you. (Just in case you want to come see me).

This show was curated by Betsy Matz and she did a great job grouping my work and putting it up for display in the Gallery portion of Bolt Barbers.

Deets: Bolt Barbers 460 South Spring Street, Los Angeles CA (5th and Spring for your cross streets). Parking can get pricey and is scarce downtown. However....if you park in the lot under the Hotel Alexandria (501 Spring Street) and purchase a validation at Bolt for $3.00.

Saturday, September 04, 2010

Gallery Card Proof


Its' official, am going into the Bolt Barbers Gallery in downtown Los Angels for a nice 2 month run. I"ll be announcing the opening reception as soon as the date has been nailed down. Likely it will be a late opening reception set in conjunction with the Downtown LA Art Walk. Exact date will be announced as soon as I know it.