Ah, the Diana, that old school "toy camera" that launched a photo revolution for its artsy out of focus and lost edge detail was one I too played with. Not as much as the "art photographers" I hung out with at dear old SIU, I was a commercial photo guy after all and our disciplines were supposed to be at cross purposes. Supposed to be but then again I've always had a hard time staying in the lines.
I stumbled across a tutorial for recreating a "Lomo" style toy camera image today and got to thinking about my long lost Diana and the images it could create. Especially if you shot slide film and had it processed in "negative" film chemicals. The changes in saturation, contrast and a host of other things created images that took advantage of the toy cameras basic "flaws". I got the urge to start recreating those images from razor sharp digital images and see what happened.
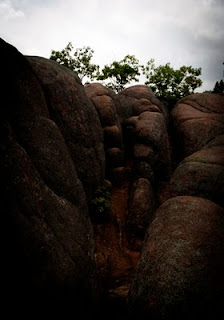
See what happened? I took a stock shot from Elephant Rocks I shot while back in MO over the summer. I am pleased with the result.
To get this image I opened a RAW file in CS5 and used the lens correction tools. I ignored the simple corrections for axis and depth of field correction and went straight to the vignetting tool to darken the corners. From there I opened the image and did a save as jpeg so I would have a standard image to work with while experimented.
The next step was to adjust the hue and color to the most natural state I could get and saved.
Next was the "duplicate layer" and let it be labled "background layer" automatically. I adjusted the saturation to more and increased the brightness by a factor of 10, playing around a bit so I kept the corners noticeably darker without blowing out the center as too bright.
Next step was to go to blur and chose lens blur. There I made several changes. I increased the blade curvature and rotation until I got the level of blur that enabled most details to remain, just pick up an overall out of focus, softness to the layer. Specular Highlights was also adjusted, to a factor of 17 for brightness and threshold moved all the way over to 255. Noise remained at 0, distribution was kept as "uniform". From there I hit OK and the PC applied the changes.
The next step was to go to the layers histogram and chose "soft light" as the blending option. This enabled to the softness of the overall background to show through keeping the feel of a toy camera in place.
Of course the easier solution to all of this is to simply find another toy digital camera that has the same "problems" IE poor optics, cheap sensors etc., that by their nature create toy camera images with all their inherent lovable flaws. May have to do that again, imagine the fun of manipulating those images down further!

No comments:
Post a Comment