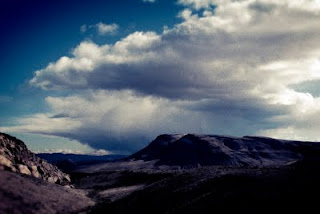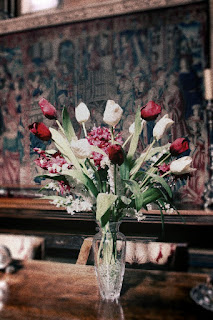

It would appear I suffer from Adult ADHD, but I really don't. I've loved Autochromes since I first saw them many years ago. Why? Because of their wonderful impressionistic, almost pointillism images they produced. Its a recurring theme with me, impressionism whether I do it in orton, lomo or autochrome style its all about recapturing that movement from over 100 years ago in the art scene in my images today.
The tutorials I've taken in recent days for Lomo gave me new ideas for recreating Autochromes in all their low res glory from high res, beautifully saturated digital images. These two images I am happiest with as they are much closer in look and feel of an Autochrome than I have been able to recreate in the past.
To break it down into steps for Adobe's CS5 you need to analyse closely what the images were all about. Interestingly their range of image topic was wide, but most focused on tablescapes or grand scale landscapes. There were plenty of portraits done too...but that isn't my bailiwick so we'll move right past that.
First the photographers of the Autochrome era worked with large format cameras with questionable optics. IE narrow depth of field and lenses that created vignetting in terms of edge sharpness and lower light transmission. Secondly the Autochrome was a contrasty film with lost detail in both highlights and shadow leaving a narrow range of grays it can capture. Saturation was low, but the vibrancy of the range of color it could capture was a bit exaggerated. Color shifts were pronounced with blues and red getting more dominance and accuracy than the greens. Blues overtook the shadows more so than any other color. Grain was an issue for them that they used to their advantage in my not so humble, those large dyed grains of potato starch were perfect for creating that pointillist capture adding to the impressionistic view mirroring what was going on in the fine art world of the time.
So here are the steps one must look at doing to create these images. Of course each step will be explained in detail after the list.
1. reduce saturation while increasing some vibrancy in the mid ranges
2. Reduce highlight/shadow detail
3. vignetting with slightly darker and out of focus edges
4. grain
First area to recreate. Open RAW file and adjust the exposure downward, increase clarity and vibrance moderately. Drop black detail to zero. Click OK and open file. Go to adjustment bar and click add gradient map, select Black&White by clicking on the slider bar that appears at top. Chose overlay and adjust to approx 50% opacity. Merge levels.
For the second area in the process go to to the adjustments bar and click levels. Adjust black slider to right to darken shadows more. Adjust highlight tab to left to brighten whites losing some detail. Return to adjustment bar and chose curves. Adjust Red and Green to increase in highlights and decrease in shadow slightly. Adjust blue to increase shadow and decrease slightly in highlights. Go to adjustment bar and click on Vibrancy, significantly increase your vibrancy by moving slider to right. Merge levels. You now have a reduced saturation slighty off color version of the original.
The third area to look at needs a couple of steps. Adding vignette of darker edges and out of focus will take a couple of steps to recreate. First to create the darker edges you use your polygonal lasso tool and draw out a rough oval shape in the image. Right click and chose "inverse selection. Go to adjustment bar and chose levels. Move the shadow slider slightly to the right to darken the edges. Merge layers.
Right click on the image and create duplicate layer. Go to the upper tool bar and chose filters, Blur - lens blur and move slider to right until you are moderately all out of focus but can still identify rough shapes. Click OK. Go to adjustment bar and click on mask. Using paintbrush tool set at 75% opacity and a large brush size, "paint" in your mask over central portion of the image in several strokes, building up to maximum masking at the center and none in corners. (You will notice that your center will increase in sharpness as you build up strokes while edges remain blurry). Merge layers. You now have an image that has darkened out of focus corners with a sharp focused center, center of attention.
The fourth and final area to manipulate is to add grain. Right click on your file and create a new layer. Chose a medium gray and using paint bucket add to the layer. Go to the upper tool bar, Filters, Noise, add noise. Move slider to right to an order of somewhere around 30-50% "noise". Select Overlay and adjust opacity percentage downwards to between 30-60% depending on your personal taste. Merge levels.
A lot of steps, but certainly much better results than the last process I was using. Better as in closer to resembling a true Autochrome. Now if I can just figure out how to recreate the "dots" surrounded in black like the originals I'd really be in business.
Enjoy "Tulips" and "Desert Storm"...Tulips I think is the closest to a true Autochrome in look.

No comments:
Post a Comment