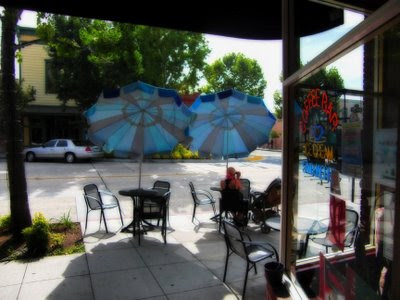
This morning I headed out for some coffee and a meeting with a person interested in running for local city council. That gave me a nice time to be down in Old Town Monrovia and just enjoy the quaintness of it all before the day heated up to a full broil. I spotted this mom type with her stroller enjoying the morning sun and a hot cup of coffee.
I composed the shot and went about my business. By itself it was OK, the post processing is the key to bring about an Orton image. I like the ability to control more elements like contrast, saturation and fuzziness in the digital realm.
A little technical stuff. The camera I shot this with was a point-n-squirt Casio Exilim that I have discussed here. The drawback to the camera is that it does not have a raw mode so I have to start with a jpeg that unfortunately does have some compression. At least with 10.1 mega pixels there is still ample to work with.
Start with your basic image file. Open it with CS2, then duplicate the image. Close the original file that way you don't alter it while working all your magic. Let the duplicate be the guinea pig.
With the new file go to image-adjustments and chose the brightness/ contrast option. As I prefer to have some detail in the shadows I up the brightness by 10-15 points, then I drop the contrast down about 5-10 points to bring back some of the highlight details.
I go to layers and chose "duplicate layer". From there I go into image-adjustments and chose brightness/contrast option again. I move the brightness to 25-35 points to mimic a one f-stop overexposure. The contrast is increased this time 10-20 points. I go back to adjustments, variations and use the saturation control. Setting at mid-point and add saturation in steps until the dept of color is just under the point I want in the final image. (Recall that the original image was lightened and flattened that did reduce your saturation a bit).
The layer then is given blur. Go to filters-blur-Gaussian blur. Pic a blur range of 15-25.
The next step is to blend the duplicate and the new layer (which is the background). Go to your layers box and use the blending tool. For this file I used the "multiply" option. I kept the opacity and fill at 100%. Note you do have several blending options as well as the ability to fine tune it by adjusting the opacity and fill levels.
The final image file then has the layers merged and run through Virtual Photographer to clean up the atmospheric haze as well as bring in some clarity to the tonal range. I opt to go for color and saturation settings that mimic the false color of fujichromes. (False as in they tended to do much better saturation with brilliant greens and blues without muddying the red tones, not entirely natural representation but certainly one that was pleasing to view).


2 comments:
You make pic taking seem so effortless. Just 1 & uhh 2 & ah 3, & any nerd can do it.
Nice/different type of shot at your coffee place
gee thanks, but then again imagine what a high ranking nerd could do...
Post a Comment