Saturday, August 30, 2008

Tone mapping to the rescue

I'm a full tonal range kinda guy. Yes, I do like lots of contrast, but recording a scene you are left to the limitations of your recording device. Digital sensors have improved tremendously over the years, but the process of converting to jpeg and then converting to a monitor a lot of that range is lost. Working from an uncompressed, all the detail there RAW file is the best way to start processing an image. NEARLY everything in the scene is there, it just needs to be coaxed out.

Tone mapping to the rescue. This program allows you to plot the parameters of your image so the range can be displayed on whatever medium you are using. Most common...your monitor and printer ranges.

For this image the jpeg displayed the pool inky black with a total lack of detail on the water. The white lily was just that blown out white lacking any detail. As I planned on working the final display image in the orton style I knew it even had its limitations. Primarily the process makes the shadows extremely dark and fuzzing up the highlight details while increasing saturation. Not a bad thing but you have to control them.

The RAW image here was opened with "camera settings". The tonal range was mapped to to have a lot of highlight and shadow detail. Micro contrast and detail settings were kept to max so I would have a realistic image and detail to work with.

The orton style proceeded with the base image being duplicated into a new background layer. That layer was given the equivalent of a one stop exposure increase then blurred at a 25 pixel range. I used the "color burn" option for the blending of the layers and they were merged. Once that was done I used virtual photographer to emphasize the color contrasts similar to the old Fuji 'chromes printed on Cibachrome printing material

This image will appear tonight, framed and ready to go at the final Monrovia Art Walk tonight. You can see it (and me) out in front of the Paint n Play Art Studio and Gallery from 6:30-9:30PM.


Friday, August 29, 2008

Monrovia Art Walk 8/30 6:30-9:30PM

A little blatant self promotion. I'll be in front of the Paint N Play Art Studio and Gallery at 415 S Myrtle Ave, Monrovia CA. Can't miss me, usually and the louder more jovial one. It will be photographers night so Stephen Coleman, Joseph Davis and Doug Gordon will all be present in front of PnP. Stop in and visit if you have nothing better to do. Better yet, buy something!


Now for the Art. These are my 4 favs from the rejuvenation visit to the Getty Villa in Malibu (Pacific Palisades area of LA) on Thursday. The Getty Villa is where they keep their antiquities. They have a lot of things you can shoot as well as rotating special exihibits that you can only view and then get raped at the book store buying the book of the images.


These images were all shot HDR. Since the antiquities are already otherwordly I opted to keep these on the edge of real. Two are of the regular exhibition rooms, one the old arched entry before the remodel, and the other in the cafeteria. The latter is titled "Add children and use loudly.

Thursday, August 28, 2008

Cars, People and 'nother slip in the adventure bucket


I'm a pretty optimistic person most of the time. Rather than a bucket list of things I want to accomplish, I have a list of cool stuff I've managed to do. My adventure bucket keeps growing and its nice to see. Each adventure I learn something new, experience something new.

Tuesday I got invited to Ford's 2009 Media Ride and Drive for the LA area. Odd..they call it LA but actually I had to venture behind the OC to attend. All very interesting, more so in the talks about the cars coming our way and their new Sync system. Of course it allows me to get into more situations to photo stuff I normally don't get to do. I got this invite through a post I did regarding the 2010 Chevy Camaro on LA Metblogs. Of course this adventure appears as a post on LA Metblogs titled "Ford Takes LA Beaches and aims for a little more".

The images here are of the 2009 Ford Focus Coupe that is just now going on sale and of the 2009 Lincoln MKS that went on sale in July. The images themselves were taken during the pre-drive discussions with the PR Guys.

I shot them bracketed knowing that the people moving would be out of register and that would add to the surreal illustrative image I wanted in the end.

After the HDR file is generated I used photomatix tone mapping to adjust the contrast range, micro-contrast and the final blending to better isolate some items while allowing others to blend into the background more. That final file was then given the final post process in Virtual Photographer to bring back some contrast and saturation to further move it from the real to surreal in the final image.

I like the final images. The cars were the subject of the day and how the media attending interacted with them was more entertaining.

Monday, August 25, 2008

arghh....you don't redo a monet nor classic movies


Stop the Remake of The Rocky Horror Picture Show

And you don't redo a classic like Rocky Horry Picture Show.
Never.
Ever.

Honest...I must have seen it 50 times in college. WE can't deprive future generations of college students of the originals insanity. All together now...

"Its just a jump to the left
and a step to the right
with your hands on your hips
you bring your knees in tight
but its the pelving thrust that really drives me insane,
Let's Do the Time Warp Again!"

Sigh...why can't we let a few things just mellow with age?

Wednesday, August 20, 2008

I'm digging my little adventures...

I have to admit I'm having a pretty interesting set of adventures once I decided to quit being a cube dweller and follow the path of greatest curiosity. This weeks adventure was a ride along with the Pasadena PD. It was very interesting, definitely a lot more action than I had expected. The full story is on LA Metblogs.

While shooting photos I had a hard time deciding where i wanted to go with the images. I certainly didn't want straight documenting, that is what the newspaper is for and the real crime scene guys.

I'm at the point now all of my images are shot raw with the intention of fine tuning exposure or generating HDR files in the post processing. With this image once I got the highlights and shadows in control I still wanted that dark almost film noire sorta colorized Raymond Chandler old timey detective feeling. Coop has been working on a series of images that are half toned and I decided to take that direction on the final image as well.

The end result: "Late Evening Arrest".

Wednesday, August 13, 2008

Morning Coffee


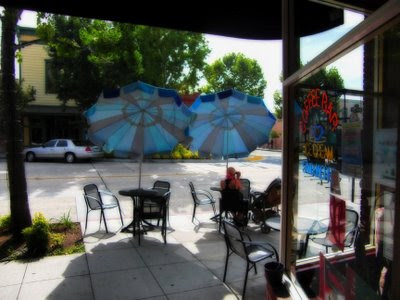
This morning I headed out for some coffee and a meeting with a person interested in running for local city council. That gave me a nice time to be down in Old Town Monrovia and just enjoy the quaintness of it all before the day heated up to a full broil. I spotted this mom type with her stroller enjoying the morning sun and a hot cup of coffee.

I composed the shot and went about my business. By itself it was OK, the post processing is the key to bring about an Orton image. I like the ability to control more elements like contrast, saturation and fuzziness in the digital realm.

A little technical stuff. The camera I shot this with was a point-n-squirt Casio Exilim that I have discussed here. The drawback to the camera is that it does not have a raw mode so I have to start with a jpeg that unfortunately does have some compression. At least with 10.1 mega pixels there is still ample to work with.

Start with your basic image file. Open it with CS2, then duplicate the image. Close the original file that way you don't alter it while working all your magic. Let the duplicate be the guinea pig.

With the new file go to image-adjustments and chose the brightness/ contrast option. As I prefer to have some detail in the shadows I up the brightness by 10-15 points, then I drop the contrast down about 5-10 points to bring back some of the highlight details.

I go to layers and chose "duplicate layer". From there I go into image-adjustments and chose brightness/contrast option again. I move the brightness to 25-35 points to mimic a one f-stop overexposure. The contrast is increased this time 10-20 points. I go back to adjustments, variations and use the saturation control. Setting at mid-point and add saturation in steps until the dept of color is just under the point I want in the final image. (Recall that the original image was lightened and flattened that did reduce your saturation a bit).

The layer then is given blur. Go to filters-blur-Gaussian blur. Pic a blur range of 15-25.

The next step is to blend the duplicate and the new layer (which is the background). Go to your layers box and use the blending tool. For this file I used the "multiply" option. I kept the opacity and fill at 100%. Note you do have several blending options as well as the ability to fine tune it by adjusting the opacity and fill levels.

The final image file then has the layers merged and run through Virtual Photographer to clean up the atmospheric haze as well as bring in some clarity to the tonal range. I opt to go for color and saturation settings that mimic the false color of fujichromes. (False as in they tended to do much better saturation with brilliant greens and blues without muddying the red tones, not entirely natural representation but certainly one that was pleasing to view).

Saturday, August 09, 2008

When HDR and Orton Collide


Orton alone tends to completly blow out highlight and black out the shadow. Doing an HDR first allows you to control the extremes first then when you run through an orton process you still have a good tonal range while still having the orton surrealness preserved.

This was shot bracketed +/- 2 stops then those raw files were processed into an HDR file with photomatix. Then the same program was used for tone mapping. The final image was given some color balancing then run through virtual photographer to give it the false saturation of a fujichrome transparency silver based film.

Thursday, August 07, 2008

Dioramas and the surreal capbilities of HDR


Museums love their diorama's recreating some era in history more than elementary school teachers do at California history lessons when they require a Mission be built.

They are always too neat and clean versions of how things were. Key period elements are usually neatly in place. Sometimes they go as far as to include paintings or photo's in the "windows" to give that added bit of "realism". It is very surreal, certainly more imaginary like the world of Wally and the Beaver than it ever was back in the day.

This week I ventured out to the Autry National Center and Western Heritage Museum in LA's Griffith Park. After checking out the newer rotating exhibits I took a meander through the permanent exhibits. To my surprise it was more than just the wild wild west, it included discussions and diorama's documenting how the western states developed right up to the post war era. Key feature was the Mrs See's home where her kitchen and den were recreated. Very clean and sterile, more romantic memory than it probably looked in real life, but interesting none the less.

It begged for a surreal rupture in the time warp. HDR helped me get there.

Once an HDR file is generated with photomatix you can use the tone mapping portion to take that file and adjust how your highlights/shadows are blended to preserve detail. Do you want more or less micro contrast? More or less luminosity to the entire image? How about blending between the two, coarse or fine? In the end you have a lot of control over the final images real or surreal qualities. Of course I gave the final image a post processing cleaning with Virtual Photographer to enhance those qualities.

Enjoy "Davy Crockett Bedroom" and "Mrs See's Kitchen".

Wednesday, August 06, 2008

Sometimes leaving it alone is best

I have to admit sometimes the tool used and the final image is just enough. I love this little image.

I used my trusty che-ez snap camera. Think of it as the Diana toy camera for the digital age. A plastic lens with pour optical qualities, very low .3mega pixels (yes POINT 3, or 1/3 megapixel) yielding very low res, uncontrolled contrast and saturation. It gives you these great little pics that are impressionistic by their nature. Not a damn thing needs to be done to them to enjoy them. You know how I loved the impressionists.
A fair warning about the che-ez if you want one. The bundled CD may not always be compatible with what is actually on the camera. You at times have to dig around the web for drivers that do work. They have a life of maybe a year or so, about 1000 pictures before the rechargeable battery craps out. I think I am on my 5th one since I found it in 2002 or so.
The camera I believe is out of production at this point. It can be found by googling it for usually under $20.
Full story behind the pic on LA Metblogs.

Saturday, August 02, 2008

rose hips...let them ripen

Rose hips from the rose "rosa hansa", a rose with a lot of wild rose parentage. It repeat blooms. It smells of cloves and spices. It rewards you with big red ripe hips if you let them go. What to do with hips?
make jelly out of them
make jams out of them
make a tea out of them
let them stay and become food for the winter song birds.

Friday, August 01, 2008

fauxtography...the art of the unreal

I didn't coin the phrase, one of my favorite writers did. His name is Will Campbell and you can find him on metblogs as well as on his own blog [sic]. He actually is owner and creator of the "fauxtography" flickr group. Anyone can join. Its a home for those photos that are faked and we aren't ashamed to admit it.

I was working the image and not happy with the sky as it completely blew out and lost all detail. Grrr....so I used the cloud tool, gradient tool and added a sky that is completely fake. I did it on purpose. It was fooling around looking to just work on that skill set. It is what it is and in the group pool.

Anyway, it has a name, it has a home. Fauxtography.

exaggerated perspective


One of my favorite lens to shoot with is an wide angle zoom, a 20-35mm to be precise. It allows for exaggerated perspective. Adjusting the angle by kneeling or standing on something also brings about other changes in how angles meet or converge. It all goes to altering the perspective and sense of space a viewer gets from the image. Even better in my book is that it also alters one sense of time and can add a lot to an impression of the subject rather than a literal interpretation. All good stuff in my book.

I continue to meander down a couple of different paths. Yesterday a couple of abandoned rail cars caught my eye while doing errands in Arcadia. I knew mid-day wasn't the time to shoot them. Wrong color of light and wrong contrasts. Dusk would be the best time as the warm glow from a setting sun will add a lot of character and nostalgia to a scene. Off I went once dinner was done to wander around the old rail cars and just shoot them. The also fit into the whole "arrested decay" direction that I have been exploring for many years as well.

I shot them bracketed for HDR file generation. The HDR files were done with Photomatix (no matter how I try with CS2's built in HDR I just don't get the control I want with it compared to what the plug-in can do). The images were then tone-mapped and run through virtual photographer for the final processing.

There you go arrested decay recorded and manipulated with the help of HDR.