 A friend of mine, Joseph R Davis turned me on to a new online gallery site for artists to showcase their work. Its pretty slick in that it gives an art lover and potential collector access to your work in the form of everything from note cards all the way up to ginormous stretched canvas prints. They do all the mark-up math, and prep for mailing and collect the money. The site is "Fine Art America and you can find me HERE. I've got a few images up but have a ton of stuff to do before it is all done, profiles, image details, gallery's events etc.,.
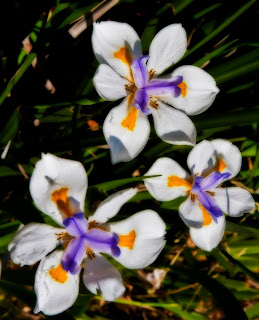
The image used in the post is done by post processing a RAW file in the orton style. I chronicled it here in the past, but it is an Adobe CS5 intensive process when one works in the digital world.
To achieve this image do your color correction from the RAW file and open. Create a new layer and label it background copy (usually the default name anyway). With that layer increase the exposure by a factor of between 1-2 stops where you still have dark areas showing. Then use the saturation tool and increase saturation by a factor of 10-20% just so you aren't as washed out due to the exposure correction. Use the blending tool at "multiply" to allow both layers to show together. I use the merge visible tool to put the two layers together, then save as a jpeg for easier up/downloading. (I also save the PSD file as it is larger and more detailed for my printing for show work).


