Saturday, May 31, 2008

A little Orton exploration

Am getting a little bored just lying around. Although I'm getting better just don't have the energy or the mobility to go shooting. I did feel well enough to fire up photoshop and dig through some older images I liked and see what I could do with Orton.

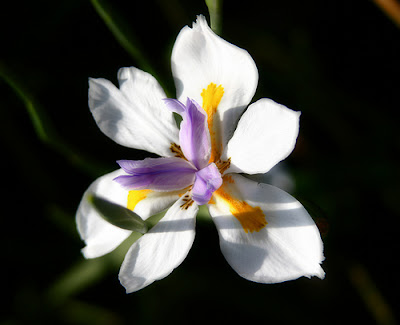
One of my favorite flowers is the African Iris aka "Fort night Lily". Its a no nonsense, no effort, odd pruning out every couple of years and whatever water falls on it keeps it going. My kind of plant.

This image was shot early morning for the longer shadows. It was framed so that the bulk of the plant was in the shadows with only the blossom in the light itself.

I discovered a new Orton technique with photoshop that I decided to try in photoshop. Pretty simple and straight forward. I think I like the results a lot more than the other I found.

Open your file. Duplicate with a new layer and name it "sharp". Use the sharp filter and sharpen the layer. Use the adjust tab and adjust your saturation and color curves. I increased the saturation for this layer from "0" to "25" Change the blend type to "multiply". Merge down the layer.

Use the duplicate new layer and name it "blur". Go to the filter tab again and use the blur option, "gaussian blur". Adjust blur to desired level, for this image I opted for a blur level of "20". Next go to the adjust tab, chose brightness and adjust brightness upwards, for this one I used a "20". Change blend type to "multiply" and adjust the opacity which I used at 75%.

Merge down the final image and save as a jpeg with maximum sharpness (IE minimal compression).

The steps aren't hard, a little time consuming but when you can find a tutorial out there it is pretty easy. In the end I like this a lot more than the original image, then again I like the romantic impressionist view of the world.

Enjoy, now for a hot tub and an ice pack as I've had enough up time for one day.

Friday, May 09, 2008

Things are going to be coming through a little slow

Just when you are on a roll things can go sideways. Tuesday sitting traffic some crazy old guy rearended me. HARD. Then for good measure he backed up and gunned it again ramming me hard a second time. Basic neck and back sprain/strain. I won't die and its proving out my brothers theory "we're like cockroaches...you can't get rid of us easy". It will slow me down a bit so do don't expect a lot of rapid fire stuff like I had been doing. (The circle is around c5 subluxation that is causing the neck problems).

Pics in my flickr set "I has car wreck" named in honor of the Lol cats.

Sunday, May 04, 2008

Orton or HDR?


Tough to tell which I like more or less than the other. HDR has a way of capturing such a complete tonal range and a few tweaks makes it very surreal. Orton does similar.

The 3 complete cars are done in HDR. The trim detail on the '47 Road Master grill was done with Orton in mind and added in a layer of grain. I give them a final wash with Virtual Photographer to bring about a depth of color found in the old Kodachromes printed on Cibachrome.

Neither are entirely real interpretation and presentations. I tend to real back with HDR and be a bit more literal. I like them both for different reasons. I guess I'll be running parallel paths for a while.

Thursday, May 01, 2008

Still running down the orton path this week

This morning I took advantage of the cool air, brilliant warm sun and no fires in the area by taking a walk through Duarte and Monrovia. I shot most all bracketed as I do a lot of HDR processing.

I have to admit that I am totally digging the orton effect being recreated in the digital realm. I found a new method with CS2 on flickr and worked with it some. I think the results are much closer to the orton I remembered.

Creating these I opened a raw file for max data and adjusted the "normal exposure" then opened and saved as a no compression jpeg. I duplicated the layer the went to filter>other>high pass and used a fairly high ratio. Then I took that layer and adjusted the blur but going to filter>blur>gaussian blur and used a moderate ration of 15-30. Then I went to adjust>brightness and lightened it up approx 1 stop.

The blending I used was "multiply". Then I flattened the image. A final correction with adjustments>levels then tweaked the highlight and shadow ranges. This was then put through virtual photographer to bring colors closer to what one would have found on Kodachrome printed on the old Cibachrome pos-to-pos print material.

It sounds like a lot of steps but after a few times I got the flow and it goes pretty fast. It still takes longer to resize for here and flickr before saving and posting somewhere.